Quick Solutions for CSS Overview: To begin, first refer – a-complete-in-depth-overview-of-css
HTML documents can have their layout and look defined using the CSS (Cascading Style Sheets) styling language. It enables developers to manage web page design elements, including fonts, colors, spacing, and responsive layouts, resulting in aesthetically pleasing and intuitive web pages. CSS offers strong capabilities to target efficiently and style elements, including selectors, inheritance, and cascade rules. It can be used inline, internally, or externally. Because it makes designs scalable, reusable, and consistent across single- or multi-page websites, it is a crucial technology in web development.
Creating and Using a Simple External CSS File
Creating and using a simple external CSS file involves separating your webpage’s design (CSS) from its content (HTML). This approach promotes maintainability and reusability. Here’s a step-by-step guide: Example: Styling a Portfolio Page
1. Create an External CSS File:
- Create a new file with the .css extension, e.g., portfolio.css.
- This CSS file defines the styles for a simple portfolio page with a navigation bar, project cards, and a footer.
- Add your CSS styles. For example:
/* portfolio.css */

/* General body styling */
body {
    font-family: 'Arial', sans-serif;
    margin: 0;
    padding: 0;
    background-color: #f4f4f9;
    color: #333;
}

/* Navigation bar */
nav {
    background-color: #343a40;
    color: white;
    padding: 15px;
    text-align: center;
}

nav a {
    color: #f8f9fa;
    margin: 0 15px;
    text-decoration: none;
    font-weight: bold;
}

nav a:hover {
    color: #17a2b8;
}

/* Header styling */
header {
    background-color: #6c757d;
    color: white;
    text-align: center;
    padding: 50px 20px;
}

header h1 {
    margin: 0;
    font-size: 2.5em;
}

header p {
    margin-top: 10px;
    font-size: 1.2em;
}

/* Project cards */
.projects {
    display: flex;
    justify-content: center;
    flex-wrap: wrap;
    padding: 20px;
}

.project-card {
    background: white;
    border: 1px solid #ddd;
    border-radius: 8px;
    box-shadow: 0 4px 6px rgba(0, 0, 0, 0.1);
    margin: 15px;
    padding: 20px;
    width: 300px;
    text-align: center;
    transition: transform 0.2s ease;
}

.project-card:hover {
    transform: scale(1.05);
}

.project-card h3 {
    color: #007bff;
}

.project-card p {
    color: #555;
}

/* Footer styling */
footer {
    background-color: #343a40;
    color: white;
    text-align: center;
    padding: 10px 0;
    margin-top: 20px;
    font-size: 0.9em;
}
2. Link the CSS File to an HTML Document:
Use the <link> tag in the <head> section of your HTML file to connect the CSS file. This file links to the portfolio.css file.
<!DOCTYPE html>
<html lang="en">
<head>
<meta charset="UTF-8">
<meta name="viewport" content="width=device-width, initial-scale=1.0">
<title>Portfolio Page</title>
<!-- Link to the external CSS file -->
<link rel="stylesheet" href="portfolio.css">
</head>
<body>
<nav>
<a href="#home">Home</a>
<a href="#projects">Projects</a>
<a href="#contact">Contact</a>
</nav>
<header>
<h1>My Portfolio</h1>
<p>Explore my work and projects</p>
</header>
<section class="projects">
<div class="project-card">
<h3>Project 1</h3>
<p>A description of the first project.</p>
</div>
<div class="project-card">
<h3>Project 2</h3>
<p>A description of the second project.</p>
</div>
<div class="project-card">
<h3>Project 3</h3>
<p>A description of the third project.</p>
</div>
</section>
<footer>
© 2024 My Portfolio | Designed by Me
</footer>
</body>
</html>Open the index.html file in a browser to see the applied styles.
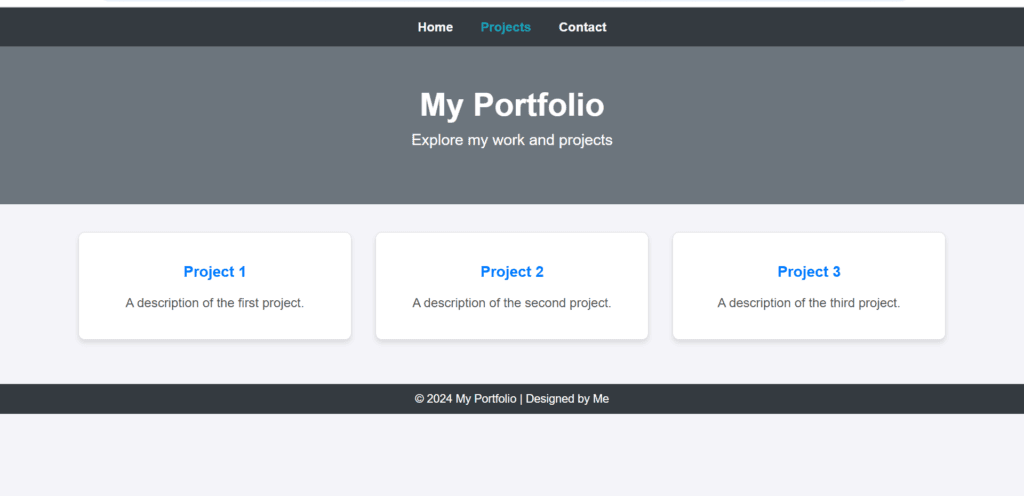
Figure 1 – Displaying the output of using an external CSS file
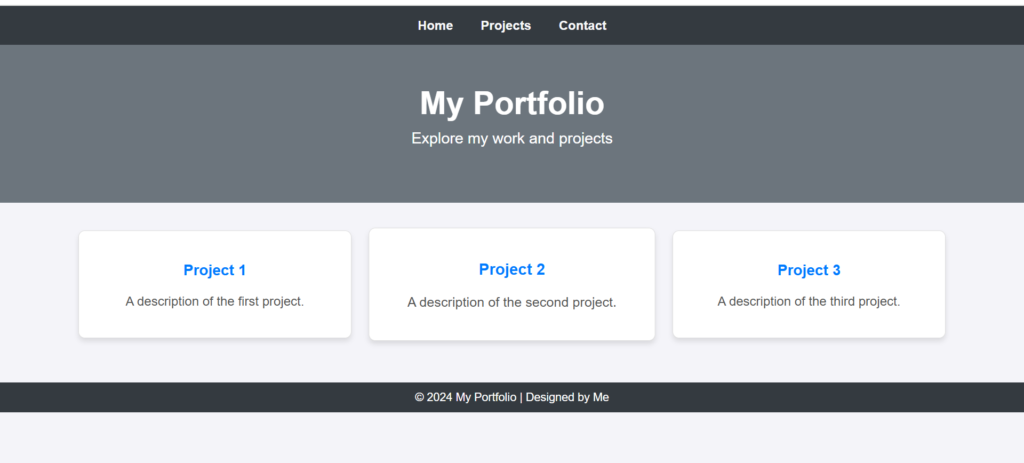
Figure 2 – Output after applying styles
Explanation:
- Separation of Concerns:
- Portfolio.css contains the CSS styles, which maintain the HTML’s organization and cleanliness.
- The CSS file can be reused for additional portfolio pages using this method.
- Responsive design:
- Project cards adjust to smaller displays thanks to the flex-wrap: wrap; in the.projects section.
- Interactive Features:
- The project cards and navigation links’ hover effect make for a dynamic and easy-to-use interface.
Using the Internal and Inline CSS Styles
Internal CSS and Inline CSS allow CSS to be applied directly within an HTML document. Here are some examples and descriptions of how they operate: Example: Profile Card with Internal and Inline CSS
Internal CSS
The <style> tag, located in the part of the HTML document, contains the internal CSS. This method is employed when styles must be applied to a single HTML page.
This example uses internal CSS to style the overall layout and elements of a profile card.
<!DOCTYPE html>
<html lang="en">
<head>
    <meta charset="UTF-8">
    <meta name="viewport" content="width=device-width, initial-scale=1.0">
    <title>Profile Card with Internal CSS</title>
    <!-- Internal CSS -->
    <style>
        body {
            font-family: 'Arial', sans-serif;
            background-color: #f8f9fa;
            margin: 0;
            display: flex;
            justify-content: center;
            align-items: center;
            height: 100vh;
        }

        .profile-card {
            background: white;
            border-radius: 10px;
            box-shadow: 0 4px 8px rgba(0, 0, 0, 0.1);
            text-align: center;
            width: 300px;
            padding: 20px;
        }

        .profile-card img {
            width: 100px;
            height: 100px;
            border-radius: 50%;
            margin-bottom: 15px;
        }

        .profile-card h2 {
            margin: 0;
            color: #333;
        }

        .profile-card p {
            color: #777;
            font-size: 14px;
        }

        .profile-card a {
            display: inline-block;
            margin-top: 10px;
            padding: 10px 20px;
            background: #007bff;
            color: white;
            text-decoration: none;
            border-radius: 5px;
        }

        .profile-card a:hover {
            background: #0056b3;
        }
    </style>
</head>
<body>
    <div class="profile-card">
        <img src="https://via.placeholder.com/100" alt="Profile Picture">
        <h2>Jane Doe</h2>
        <p>Web Developer | Designer</p>
        <a href="#">Contact Me</a>
    </div>
</body>
</html>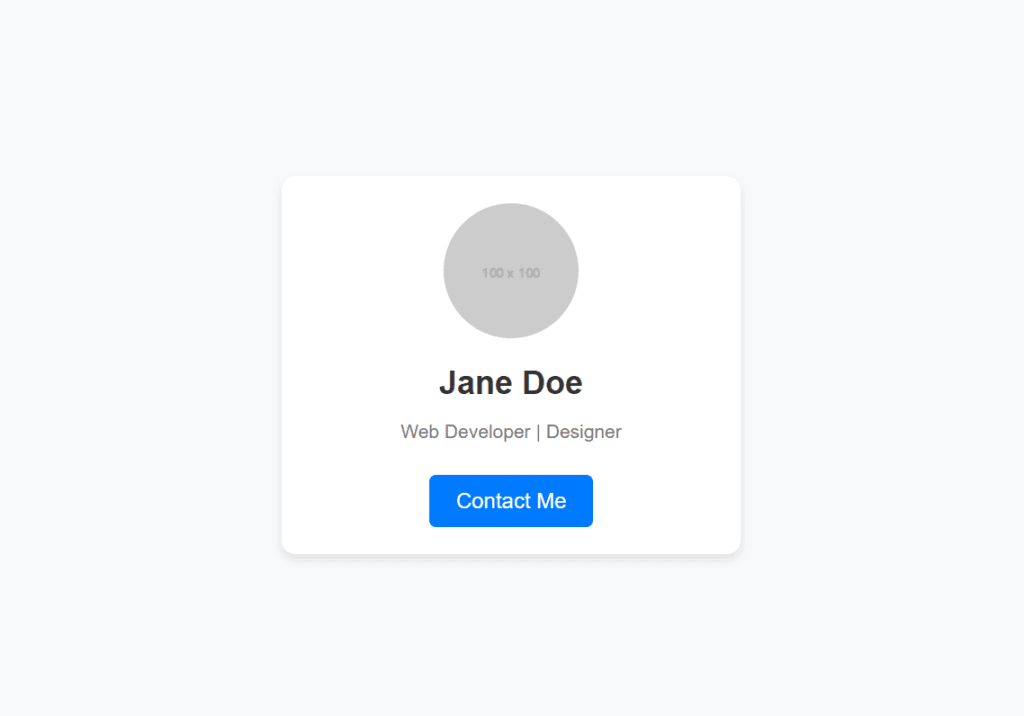
Figure 3 – Displaying the output of using Internal CSS
Inline CSS
Inline CSS is applied directly to specific HTML elements using the style attribute. This method is useful for applying unique styles to individual elements.
This example uses inline CSS to style the overall layout and elements of a profile card.
<!DOCTYPE html>
<html lang="en">
<head>
    <meta charset="UTF-8">
    <meta name="viewport" content="width=device-width, initial-scale=1.0">
    <title>Inline CSS Example</title>
</head>
<body style="font-family: Arial, sans-serif; background-color: #fafafa; margin: 0; padding: 0;">
    <h1 style="color: #333; text-align: center;">Welcome to My Website</h1>
    <p style="color: #555; line-height: 1.6; text-align: justify; margin: 0 20px;">
        This paragraph is styled using Inline CSS. Inline styles are applied directly to the HTML elements using the <code>style</code> attribute.
    </p>
    <p style="margin: 0 20px; text-align: center;">
        <a href="#" style="color: #1e90ff; text-decoration: none;">Learn More</a>
    </p>
</body>
</html>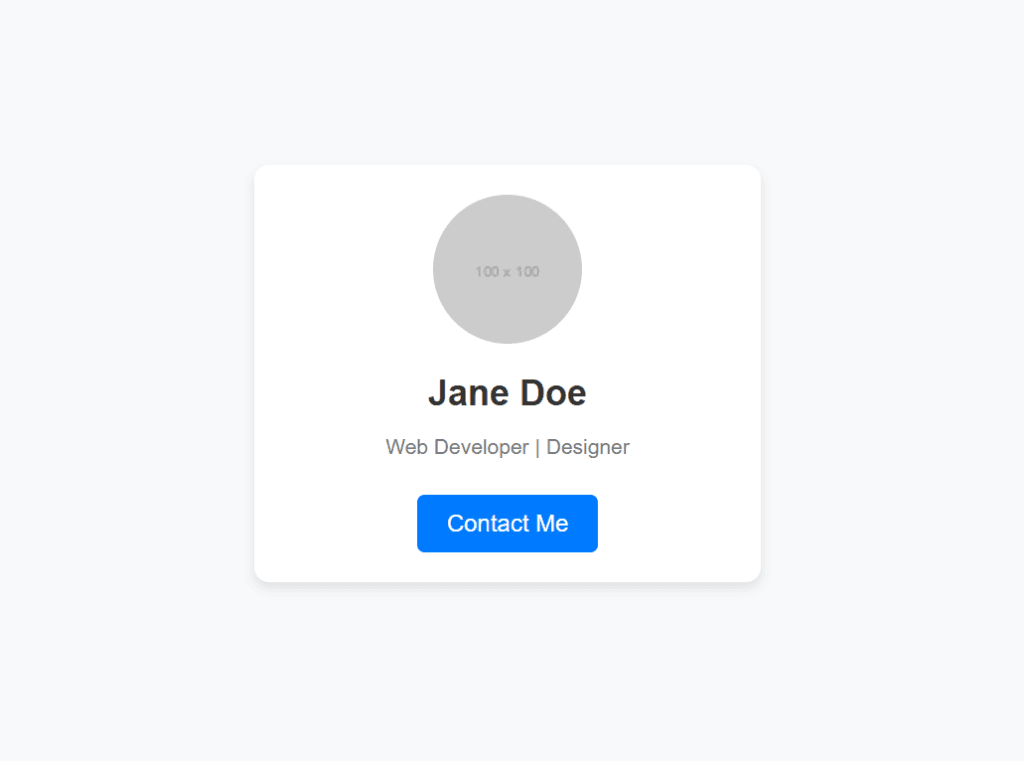
Figure 4 – Displaying the output of using Inline CSS
For Both Examples:
When viewed in a browser, the output will be:
- Layout:
- a card with a faint shadow, rounded corners, and a white background that is centered on the screen.
- Profile Image:
- a round picture at the card’s top.
- Content:
- Larger, bolder writing in a dark gray color is used to design the user’s name, Jane Doe.
- Smaller, more subdued text is used to style the role/title (Web Developer | Designer).
- Button:
- White writing on a blue “Contact Me” button.
- The button’s backdrop turns a deeper shade of blue when you hover over it.
Explanation:
- Internal CSS:
- centralizes styles in the <style> element, which facilitates the application and management of consistent styles across the content.
- It works well with reusable components like the profile card.
- Inline CSS:
- The style attribute is used to apply styles directly to HTML components.
- It’s quick and helpful for one-off designs, but it makes HTML more difficult to comprehend and manage.
- Differences in Output:
- For both methods, the visual result is the same.
- How the styles are used is where the main distinction can be found.
Advantages of Each:
| Feature | Internal CSS | Inline CSS |
| Maintainability | Easier to maintain and modify | Harder to update, especially for large elements |
| Code Readability | Cleaner separation of content/style | content |
| Use Case | Ideal for a single page or section | Ideal for quick, small changes |
Working with the querySelector() Method
JavaScript’s querySelector() method is used to choose the first DOM element that matches a given CSS selector. Any CSS selector, including class, ID, and attribute selectors, can be used with this approach, making it flexible.
Syntax: (JavaScript)
document.querySelector(selector);- selector: One or more CSS selectors contained in a string.
- Returns: The first element that matches, or null if none does.
Example: Changing Element Content and Style
In this example, we’ll use querySelector() to manipulate DOM elements.
<!DOCTYPE html>
<html lang="en">
<head>
    <meta charset="UTF-8">
    <meta name="viewport" content="width=device-width, initial-scale=1.0">
    <title>querySelector() Example</title>
    <style>
        .highlight {
            color: blue;
            font-weight: bold;
        }
        #message {
            color: gray;
            margin-top: 20px;
        }
    </style>
</head>
<body>
    <h1 class="title">Welcome to the querySelector Demo</h1>
    <p class="highlight">This is the first paragraph.</p>
    <p>This is the second paragraph.</p>
    <button id="changeButton">Change Content</button>
    <p id="message"></p>

    <script>
        // Example 1: Select the first element with the class "highlight"
        const firstHighlight = document.querySelector('.highlight');
        console.log(firstHighlight); // Logs the first <p> element with class "highlight"

        // Example 2: Select an element by ID
        const message = document.querySelector('#message');

        // Example 3: Add an event listener to the button
        const button = document.querySelector('#changeButton');
        button.addEventListener('click', function () {
            // Change the text content of the first .highlight element
            firstHighlight.textContent = 'This paragraph has been updated!';

            // Change the style of the #message element
            message.textContent = 'Content and style updated!';
            message.style.color = 'green';
        });
    </script>
</body>
</html>
Explanation:
- Select Elements Using querySelector():
- Using the class highlight, document.querySelector(‘.highlight’) chooses the first element.
- Using the ID message, document.querySelector(‘#message’) chooses the element.
- Add Interactivity:
- The button labeled “changeButton” is chosen.
- When the button is pressed, the first paragraph’s text content is altered to include the class highlight.
- incorporates the ID message into the paragraph’s design and text.
- CSS Styling:
- The original styling of the.highlight class makes the text bold and blue.
- The #message element’s text color is dynamically changed to green upon button click.
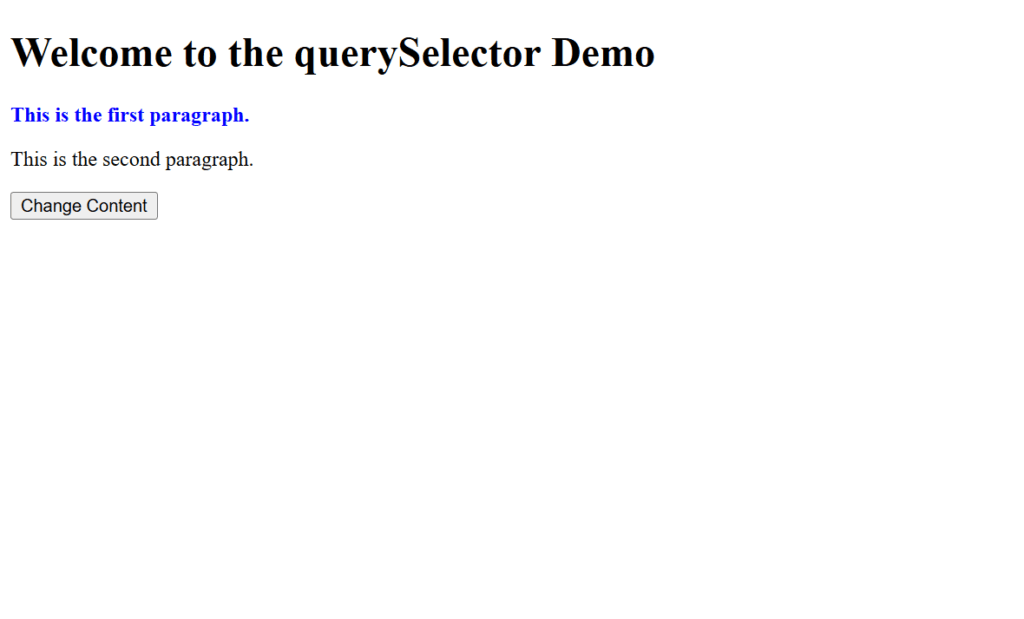
Figure 5 – Displaying the output of using querySelector(). (Initial View)
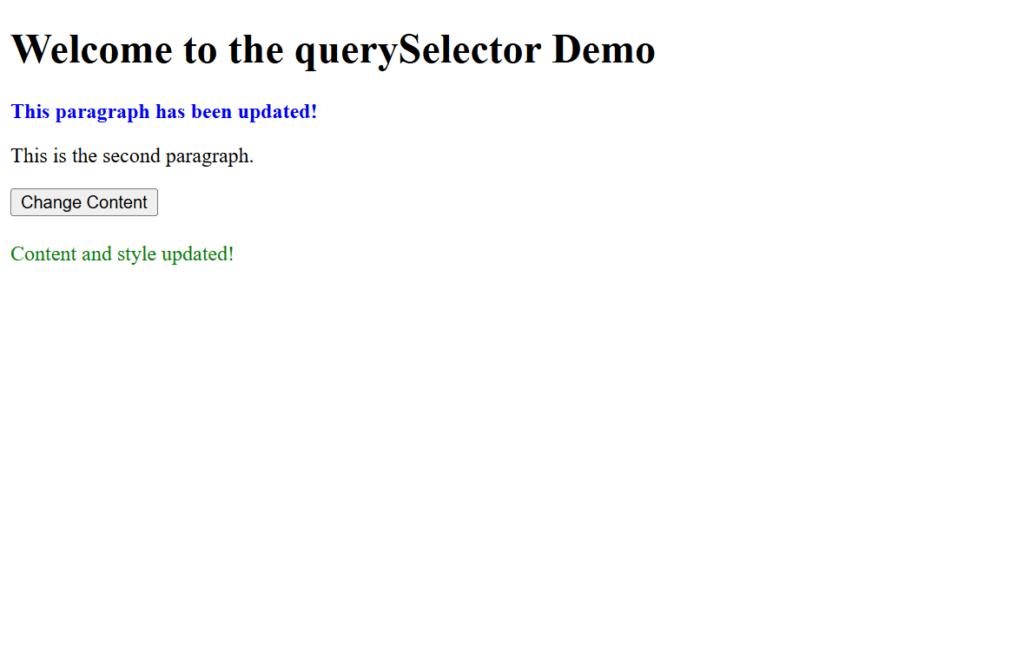
Figure 6 – View After Clicking the Button
- Initial View:
- A heading: “Welcome to the querySelector Demo”.
- The first paragraph is blue and bold due to the highlight class.
- The second paragraph is plain text.
- A button labeled “Change Content”.
- An empty message paragraph below the button.
- After Clicking the Button:
- The text of the first paragraph changes to: “This paragraph has been updated!”.
- The message paragraph displays: “Content and style updated!”, styled in green.
Advantages of querySelector()
QuerySelector()’s benefits include the ability to precisely select elements with CSS-like precision.
Class, ID, attribute, and even nested selectors (.parent.child) can be used with this versatile tool.
Things to Note
The querySelector() function returns null if no element matches the selection.
To choose more than one element, use querySelectorAll().
Working with the querySelectorAll() Method
JavaScript’s querySelectorAll() function selects every element in the DOM that matches a given CSS selector. A static NodeList with all matching elements is returned by querySelectorAll(), in contrast to querySelector(), which only chooses the first matched node.
Syntax: (JavaScript)
document.querySelectorAll(selector);- selector: One or more CSS selectors contained in a string.
- Returns: A matching elements NodeList. To operate with each element, you can loop through this NodeList.
Example: Highlighting Multiple Elements
In this example, we’ll use querySelectorAll() to select and manipulate multiple elements.
<!DOCTYPE html>
<html lang="en">
<head>
    <meta charset="UTF-8">
    <meta name="viewport" content="width=device-width, initial-scale=1.0">
    <title>querySelectorAll() Example</title>
    <style>
        .item {
            font-size: 18px;
            color: black;
            margin: 5px 0;
        }

        .highlight {
            color: green;
            font-weight: bold;
        }
    </style>
</head>
<body>
    <h1>Grocery List</h1>
    <ul>
        <li class="item">Apples</li>
        <li class="item">Bananas</li>
        <li class="item">Oranges</li>
        <li class="item">Grapes</li>
    </ul>
    <button id="highlightButton">Highlight Items</button>

    <script>
        // Select all elements with the class "item"
        const items = document.querySelectorAll('.item');

        // Log the NodeList to the console
        console.log(items); // Logs a NodeList of all <li> elements with class "item"

        // Add an event listener to the button
        const button = document.querySelector('#highlightButton');
        button.addEventListener('click', function () {
            // Loop through the NodeList
            items.forEach((item, index) => {
                // Highlight each item
                item.classList.add('highlight');

                // Log the item text content to the console
                console.log(`Item ${index + 1}: ${item.textContent}`);
            });
        });
    </script>
</body>
</html>
Explanation:
- Select Multiple Elements:
- All <li> elements with the class item are selected by document.querySelectorAll(‘.item’) and stored in a NodeList named items.
- Loop Through the NodeList:
- Every element in the NodeList is iterated through by the forEach() method.
- We provide each list item a new class (highlight) inside the loop.
- Event Listener:
- A function that adds the highlight class to all of the items in the list is triggered when the “Highlight Items” button is clicked.
- Dynamic Logging:
- The text content of each item is logged to the console along with its index using the console.log() command.
- CSS:
- The.highlight class makes the text bold and changes its color to green.
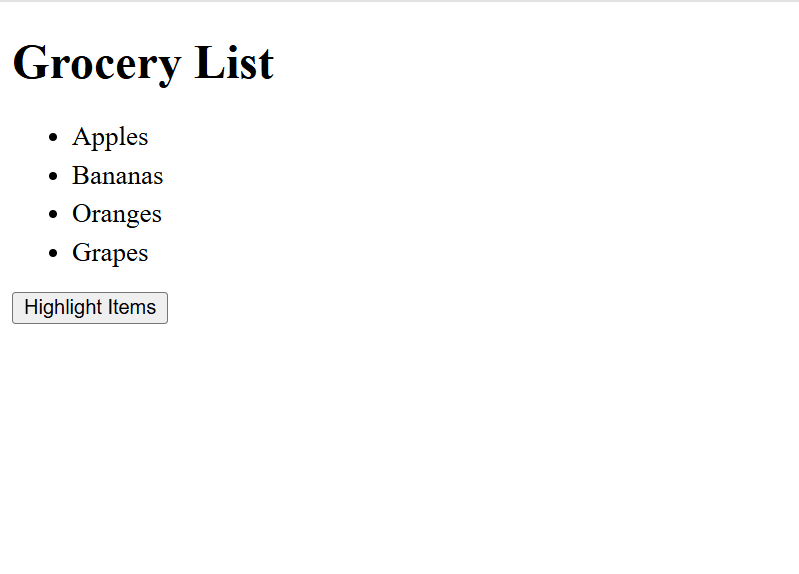
Figure 7 – Displaying the output of using querySelectorAll() function (Initial View)
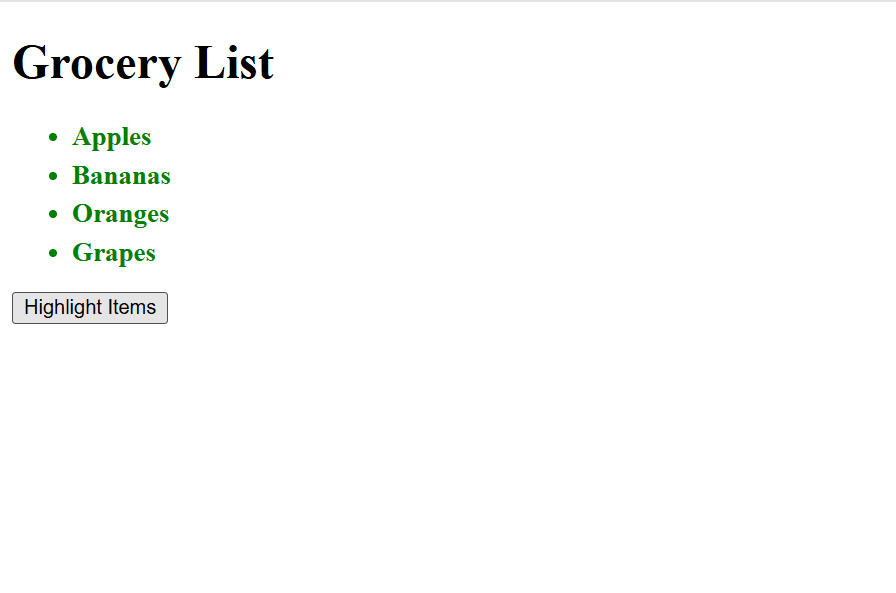
Figure 8 – View After Clicking the Button
- Initial View:
- A heading: “Grocery List”.
- A list of grocery items (e.g., Apples, Bananas, Oranges, Grapes) in black text.
- A button labeled “Highlight Items”.
- After Clicking the Button:
- All the list items turn green and bold, indicating they have been highlighted.
Advantages of querySelectorAll()
- Powerful and Flexible: Compatible with all CSS selectors, including class, ID, attribute, and nested selections.
- Accurate Selection: Returns not only the first match but all matched elements in the DOM.
- NodeList Compatibility: For more complex tasks, a NodeList can be transformed into an array or iterated using forEach() or for…of.
Things to Note
- The returned NodeList is static, meaning it does not update if the DOM changes after the querySelectorAll() call.
- Use classList to add, remove, or toggle classes dynamically for selected elements.
Working with @import Rule
In CSS, styles from other CSS files can be imported into the current CSS file using the @import rule. Because of this, stylesheets can be modularized, which facilitates the reuse and maintenance of common styles across several pages.
Syntax
@import url('path/to/stylesheet.css');- url(): Specifies the path to the CSS file to import.
Key Points:
- Modular Design: Divide styles among several files and import them only as required.
- Load Order: The order in which imported files are loaded determines which styles are applied.
- Performance Consideration: Because @import necessitates an additional HTTP request, it may cause page rendering to lag. For speedier loading, it’s usually preferable to provide CSS using.
Let’s demonstrate using the @import rule with external CSS:
Step 1: Create the CSS Files
1. base.css
Global styles applied to all pages.
/* base.css */
body {
    font-family: Arial, sans-serif;
    margin: 0;
    padding: 0;
    background-color: #f4f4f4;
}

h1 {
    color: #333;
    text-align: center;
    margin: 20px 0;
}
2. layout.css
Defines layout-related styles.
/* layout.css */
.container {
    max-width: 1200px;
    margin: 0 auto;
    padding: 20px;
    text-align: center;
}
3. buttons.css
Button-specific styles.
/* buttons.css */
.button {
    background-color: #007bff;
    color: white;
    padding: 10px 20px;
    border: none;
    border-radius: 5px;
    cursor: pointer;
    transition: background-color 0.3s ease;
}

.button:hover {
    background-color: #0056b3;
}
Step 2: Import CSS Files Using @import
Now let’s create a main.css file and import the other CSS files into it. The main.css uses @import to bring the other CSS files together.
/* main.css */
@import url('./base.css');
@import url('./layout.css');
@import url('./buttons.css');
Step 3: Link main.css to Your HTML
Finally, you link the main.css file into your HTML file like this:
<!DOCTYPE html>
<html lang="en">
<head>
  <meta charset="UTF-8">
  <meta name="viewport" content="width=device-width, initial-scale=1.0">
  <title>Using @import Example</title>
  <link rel="stylesheet" href="main.css">
</head>
<body>
  <h1>Welcome to @import Example</h1>
  <div class="container">
    <button class="button">Click Me</button>
  </div>
</body>
</html>
How to Make This Work
- Ensure all CSS files are in their proper paths relative to each other:
- main.css should have access to base.css, layout.css, and buttons.css.
- The @import URL paths should be correct, matching folder structure.
- Open the importrule.html in your browser directly or using a local server.
- If you’re on VSCode, you can use extensions like Live Server to view the page live.

Figure 9 – Displaying the output of using @import rule

Figure 10 – Displaying the output of using @import rule (after hover effect)
Expected Result
After running the code:
- Heading: The text Welcome to @import Example will be centered and styled in dark gray.
- Container: The container will ensure proper alignment.
- Button: A blue button labeled Click Me with a hover effect will appear.