Here are some Simple Methods for Using Objects in a Browser: To begin, first refer – working-with-objects-in-browsers
Working with the Window Object Properties:
In JavaScript, the global object for the browser is called the Window object. The script window or tab is represented by it, and it offers properties and methods for interacting with it. Here’s a comprehensive example showing you how to manipulate the Window object’s several properties. To display and modify window information, an HTML page with integrated JavaScript will be used in this example:
<!DOCTYPE html>
<html lang="en">
<head>
    <meta charset="UTF-8">
    <meta name="viewport" content="width=device-width, initial-scale=1.0">
    <title>Window Object Properties Example</title>
    <style>
        body {
            font-family: Arial, sans-serif;
        }
        .property {
            margin-bottom: 10px;
        }
        button {
            margin-top: 10px;
        }
    </style>
</head>
<body>
    <h1>Window Object Properties Example</h1>
    <div class="property">
        <strong>Window Dimensions:</strong> <span id="windowDimensions"></span>
    </div>
    <div class="property">
        <strong>Current URL:</strong> <span id="currentURL"></span>
    </div>
    <div class="property">
        <strong>Browser Information:</strong> <span id="browserInfo"></span>
    </div>
    <div class="property">
        <strong>Screen Information:</strong> <span id="screenInfo"></span>
    </div>
    <div class="property">
        <strong>Scroll Position (X, Y):</strong> <span id="scrollPosition"></span>
    </div>
    <div class="property">
        <strong>Is Window Closed:</strong> <span id="isClosed"></span>
    </div>
    <button id="checkClosedButton">Check if Window is Closed</button>

    <script>
        // Function to update window dimensions
        function updateWindowDimensions() {
            document.getElementById('windowDimensions').textContent = `Inner: ${window.innerWidth}x${window.innerHeight}, Outer: ${window.outerWidth}x${window.outerHeight}`;
        }

        // Initial call to display window dimensions
        updateWindowDimensions();

        // Update window dimensions on resize
        window.addEventListener('resize', updateWindowDimensions);

        // Display current URL
        document.getElementById('currentURL').textContent = window.location.href;

        // Display browser information
        document.getElementById('browserInfo').textContent = `Name: ${window.navigator.appName}, Version: ${window.navigator.appVersion}`;

        // Display screen information
        document.getElementById('screenInfo').textContent = `Width: ${window.screen.width}, Height: ${window.screen.height}`;

        // Display scroll position
        function updateScrollPosition() {
            document.getElementById('scrollPosition').textContent = `(${window.scrollX}, ${window.scrollY})`;
        }

        // Initial call to display scroll position
        updateScrollPosition();

        // Update scroll position on scroll
        window.addEventListener('scroll', updateScrollPosition);

        // Check if window is closed
        function checkIfClosed() {
            document.getElementById('isClosed').textContent = window.closed ? "Yes" : "No";
        }

        // Initial call to check if window is closed
        checkIfClosed();

        // Add event listener to the button
        document.getElementById('checkClosedButton').addEventListener('click', checkIfClosed);
    </script>
</body>
</html>- Window Dimensions: Whenever the window is resized, the innerWidth, innerHeight, outerWidth, and outerHeight attributes are shown and updated.
- Current URL: The page’s current URL is displayed using the window.location.href attribute.
- Browser Information: Details about the browser, including its name and version, are provided via the window.navigator object.
- Screen Information: The window provides the width and height of the user’s screen.screen object.
- Scroll Position: The window’s current scroll position is shown and updated whenever the user scrolls the page.
- Window Closed Status: To determine whether a window is closed, use the window.closed property. The user can manually check the status by pressing a button.
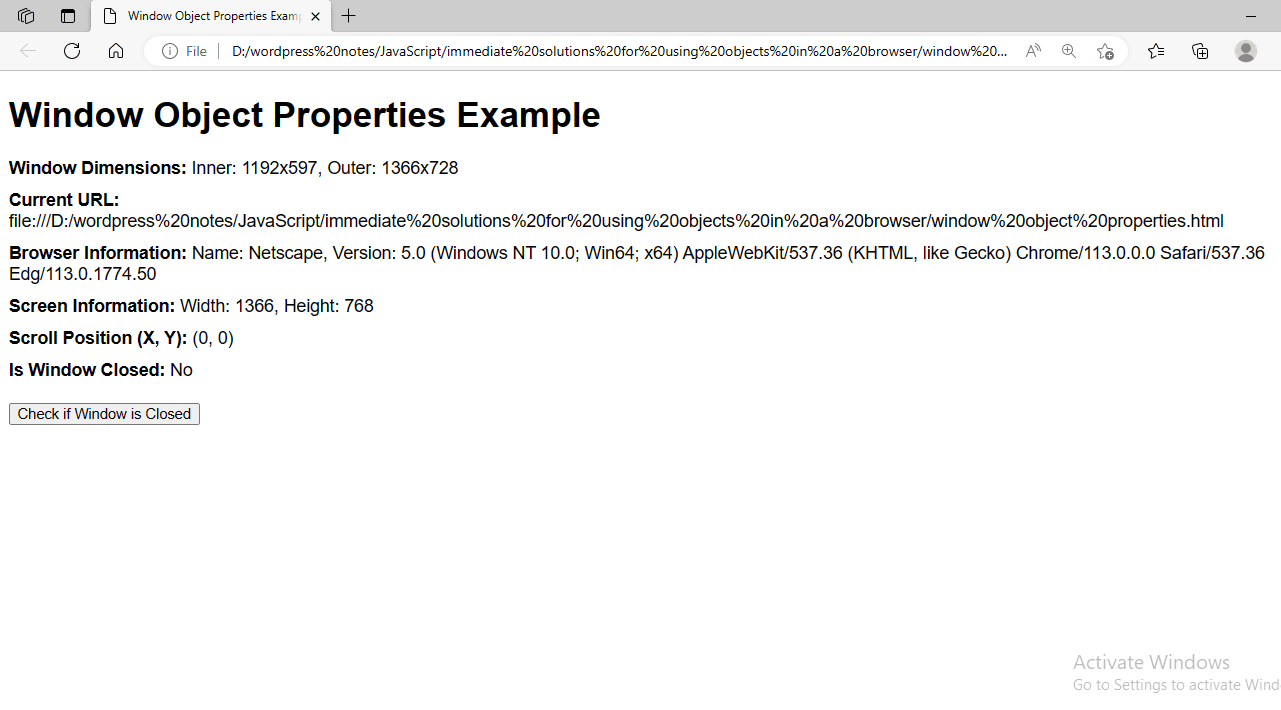
Figure 1 – Displaying the Output of Using the Window Object Properties in JavaScript
This example shows how to handle user interactions and dynamically display and update information about the browser window and the user’s environment using different Window object properties.
Working with the Window Object Methods:
JavaScript’s Window object has some methods for interacting with the browser window, such as managing time-based events, displaying alarms, and opening new windows. Here is a complete example showing how to use various Window object methods:
<!DOCTYPE html>
<html lang="en">
<head>
    <meta charset="UTF-8">
    <meta name="viewport" content="width=device-width, initial-scale=1.0">
    <title>Window Object Methods Example</title>
    <style>
        body {
            font-family: Arial, sans-serif;
        }
        .method {
            margin-bottom: 20px;
        }
        button {
            margin-top: 10px;
            margin-right: 10px;
        }
    </style>
</head>
<body>
    <h1>Window Object Methods Example</h1>

    <div class="method">
        <strong>Alert Method:</strong>
        <button onclick="showAlert()">Show Alert</button>
    </div>

    <div class="method">
        <strong>Confirm Method:</strong>
        <button onclick="showConfirm()">Show Confirm</button>
        <div id="confirmResult"></div>
    </div>

    <div class="method">
        <strong>Prompt Method:</strong>
        <button onclick="showPrompt()">Show Prompt</button>
        <div id="promptResult"></div>
    </div>

    <div class="method">
        <strong>Open New Window:</strong>
        <button onclick="openNewWindow()">Open Window</button>
        <button onclick="closeNewWindow()">Close Window</button>
    </div>

    <div class="method">
        <strong>Set Timeout:</strong>
        <button onclick="setWindowTimeout()">Set Timeout</button>
        <div id="timeoutResult"></div>
    </div>

    <div class="method">
        <strong>Set Interval:</strong>
        <button onclick="startInterval()">Start Interval</button>
        <button onclick="stopInterval()">Stop Interval</button>
        <div id="intervalResult"></div>
    </div>

    <script>
        // Alert method
        function showAlert() {
            window.alert("This is an alert!");
        }

        // Confirm method
        function showConfirm() {
            let result = window.confirm("Do you confirm this action?");
            document.getElementById('confirmResult').textContent = result ? "Confirmed" : "Cancelled";
        }

        // Prompt method
        function showPrompt() {
            let result = window.prompt("Please enter your name:", "Harry Potter");
            document.getElementById('promptResult').textContent = result ? `Hello, ${result}` : "User cancelled the prompt.";
        }

        // Open new window
        let newWindow;
        function openNewWindow() {
            newWindow = window.open("", "newWindow", "width=300,height=200");
            newWindow.document.write("<p>This is a new window.</p>");
        }

        // Close new window
        function closeNewWindow() {
            if (newWindow) {
                newWindow.close();
            }
        }

        // Set timeout
        function setWindowTimeout() {
            window.setTimeout(function() {
                document.getElementById('timeoutResult').textContent = "Timeout executed!";
            }, 2000);
        }

        // Set interval
        let intervalId;
        function startInterval() {
            let count = 0;
            intervalId = window.setInterval(function() {
                document.getElementById('intervalResult').textContent = `Interval count: ${++count}`;
            }, 1000);
        }

        function stopInterval() {
            if (intervalId) {
                window.clearInterval(intervalId);
            }
        }
    </script>
</body>
</html>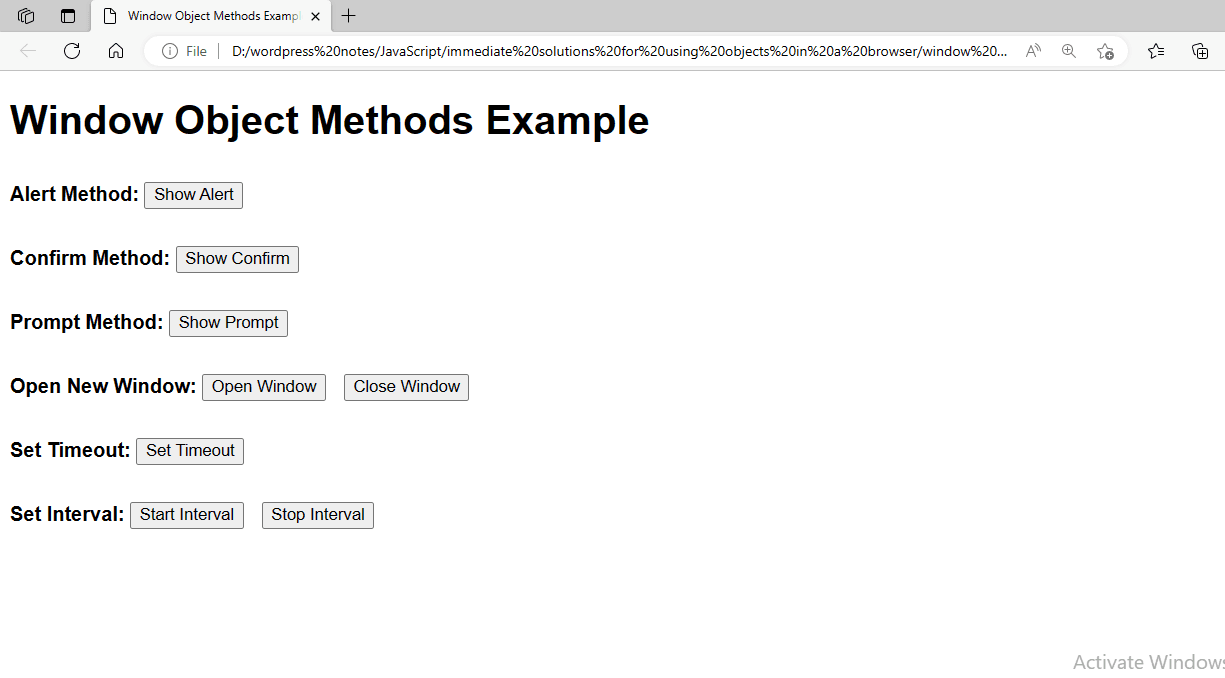
Figure 2 – Displaying the Output of Using the Window Object Methods in JavaScript
Explanation:
1. Alert Method: Shows a brief alert dialog box containing a message.
function showAlert() {
    window.alert("This is an alert!");
}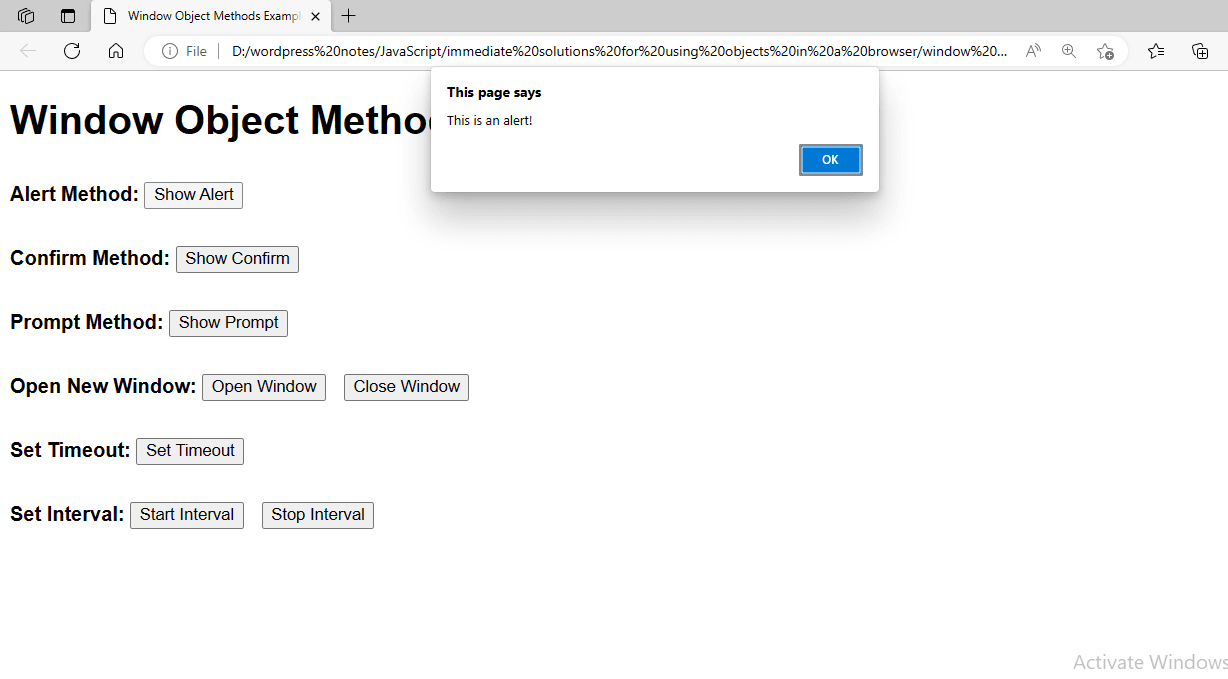
Figure 2.1 – Displaying an Alert Box.
2. Confirm Method: A confirmation dialog is displayed and the page is updated based on the user’s response.
function showConfirm() {
    let result = window.confirm("Do you confirm this action?");
    document.getElementById('confirmResult').textContent = result ? "Confirmed" : "Cancelled";
}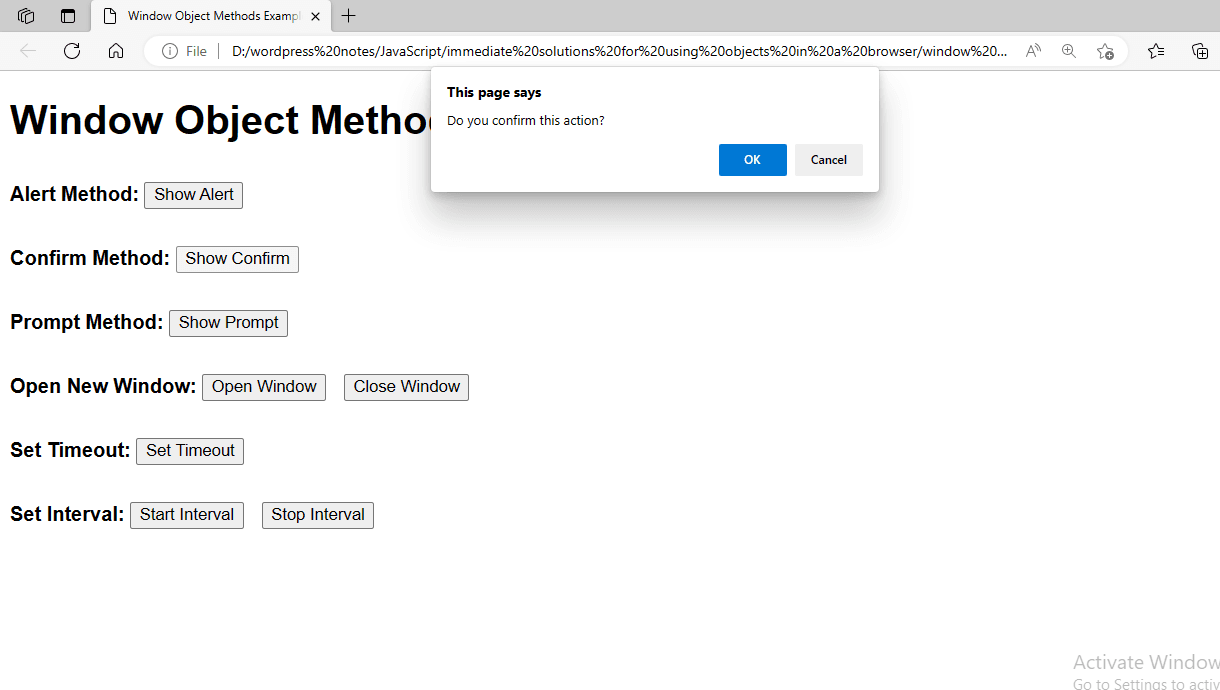
Figure 2.2- Displaying a Confirm action Box
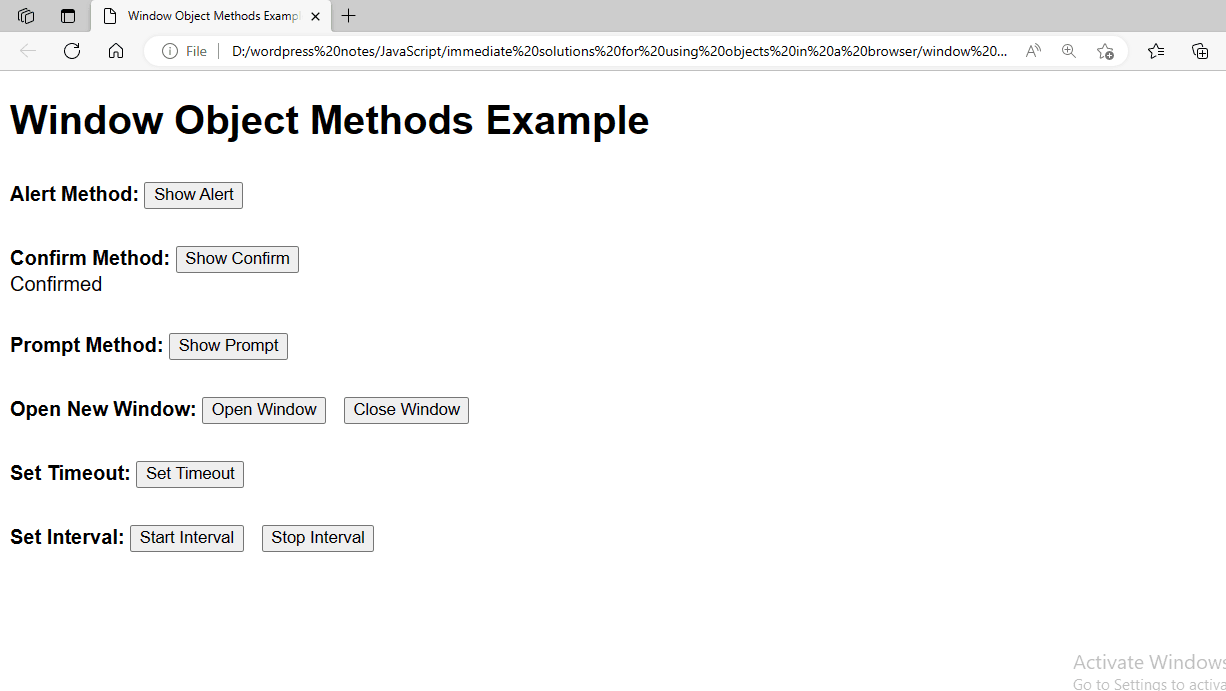
Figure 2.2.1 – Displaying the Updated page after Confirming
3. Prompt Method: Shows a dialog box asking for input from the user, then modifies the page accordingly.
function showPrompt() {
    let result = window.prompt("Please enter your name:", "Harry Potter");
    document.getElementById('promptResult').textContent = result ? `Hello, ${result}` : "User cancelled the prompt.";
}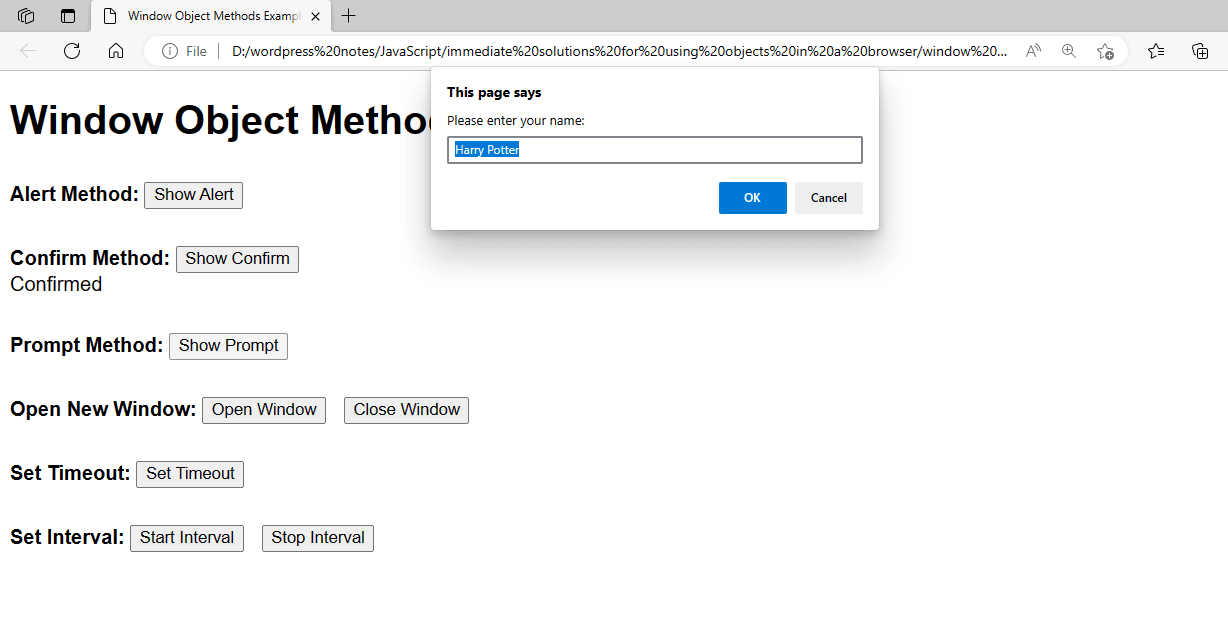
Figure 2.3 – Displaying the Dialog Box
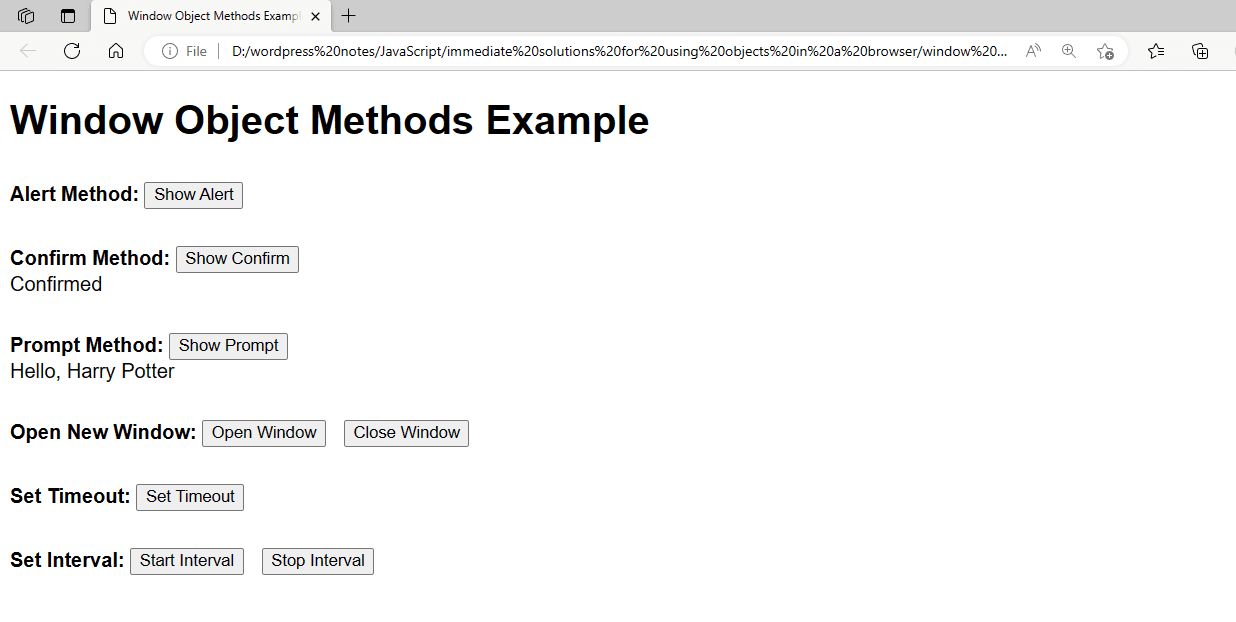
Figure 2.3.1 – Displaying the Updated page after Inputting User Name
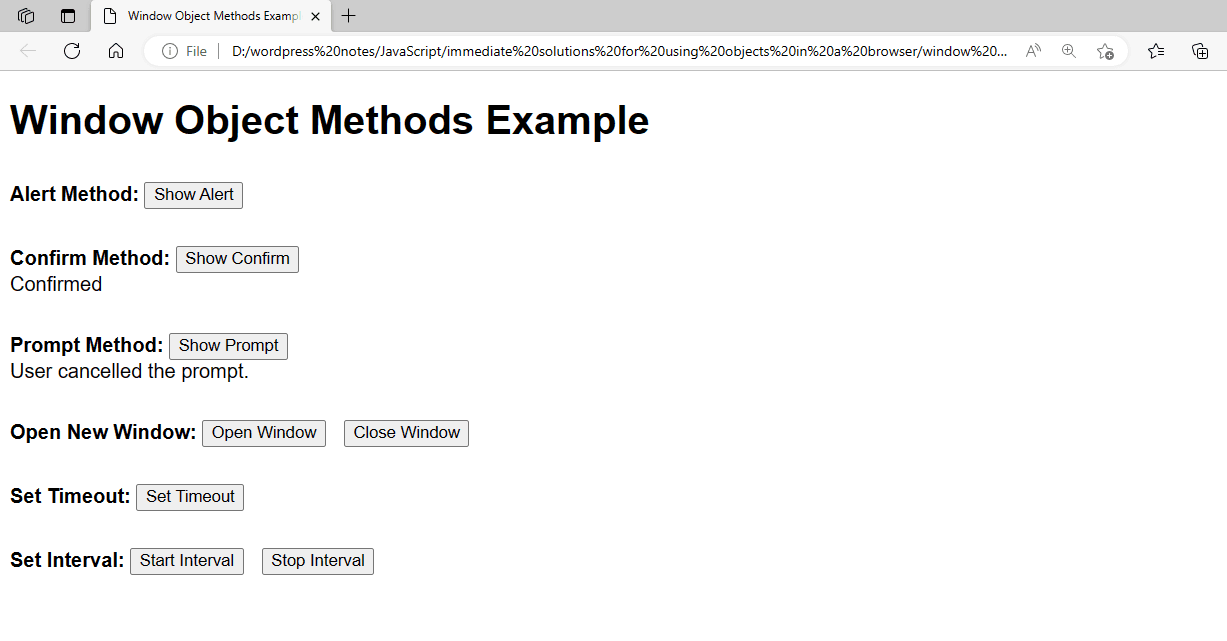
Figure 2.3.2 – Showing the Updated Page after Omitting the User Name
4. Open and Close New Window: This command opens a new window, adds content, and then offers a close button.
let newWindow;
function openNewWindow() {
    newWindow = window.open("", "newWindow", "width=300,height=200");
    newWindow.document.write("<p>This is a new window.</p>");
}

function closeNewWindow() {
    if (newWindow) {
        newWindow.close();
    }
}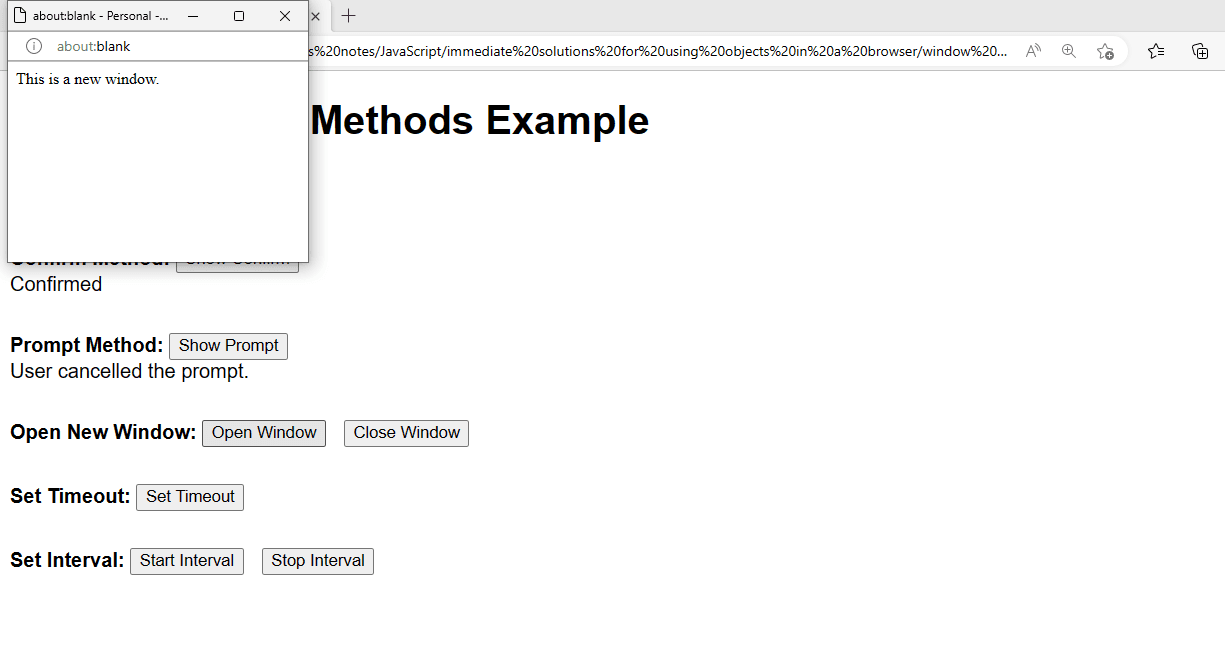
Figure 2.4 – Showing the New Window
5. Set Timeout: Carry out a function within a predetermined time.
function setWindowTimeout() {
    window.setTimeout(function() {
        document.getElementById('timeoutResult').textContent = "Timeout executed!";
    }, 2000);
}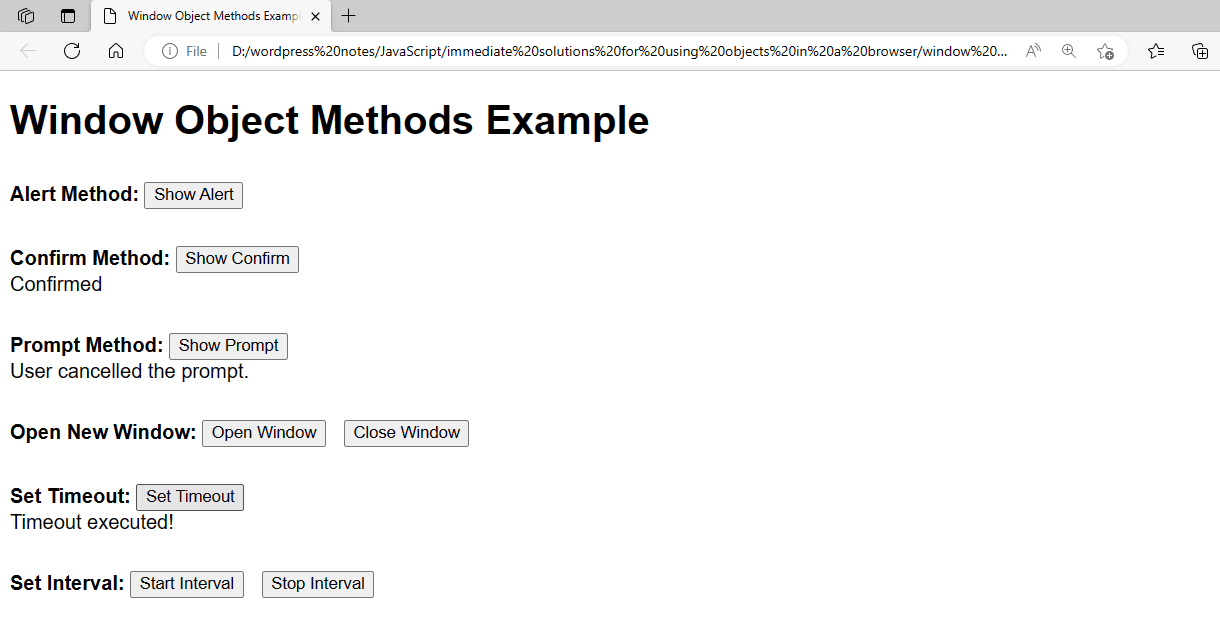
Figure 2.5 – Displaying the Set Timeout Function
6. Set Interval: This feature allows you to program a function to be executed repeatedly at predetermined intervals and includes buttons to start and end the interval.
let intervalId;
function startInterval() {
    let count = 0;
    intervalId = window.setInterval(function() {
        document.getElementById('intervalResult').textContent = `Interval count: ${++count}`;
    }, 1000);
}

function stopInterval() {
    if (intervalId) {
        window.clearInterval(intervalId);
    }
}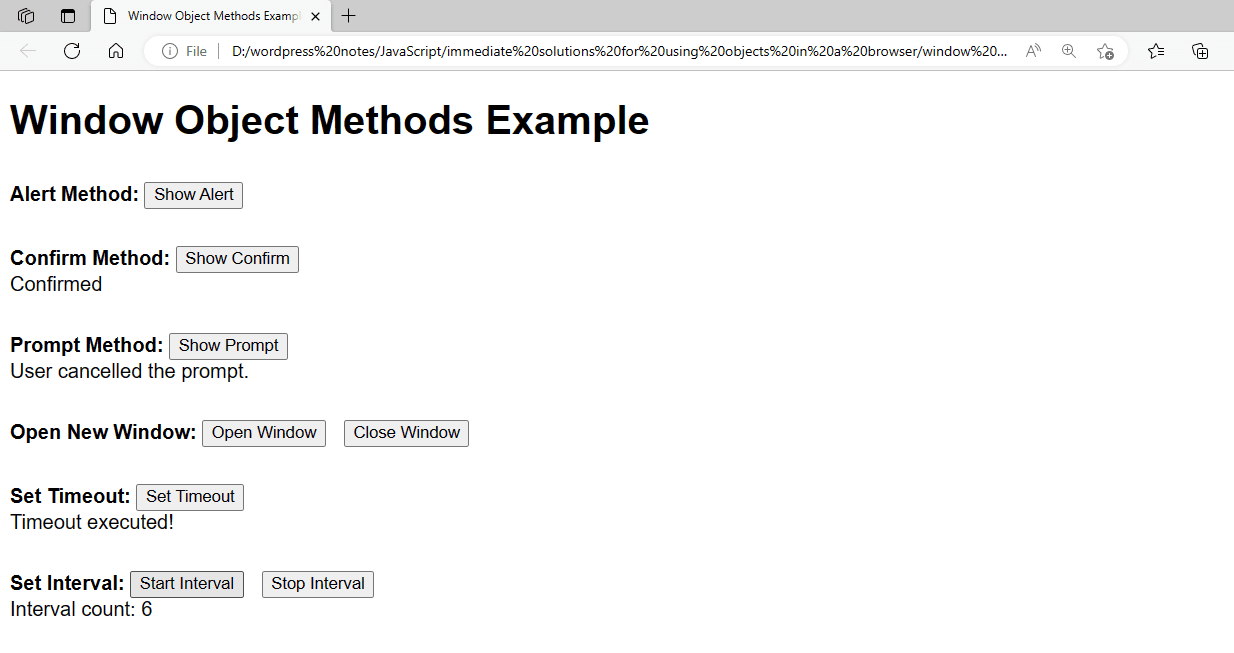
Figure 2.6 – Displaying the Set Interval Function
This example shows you how to interact with the browser and carry out tasks like showing dialog boxes, launching and shutting windows, and managing timed events by using different methods of the Window object.
Working with the Navigator Object Properties:
In JavaScript, the Navigator object offers details about the user’s browser. This object has characteristics that describe the platform, user agent, version, and more of the browser. This example shows you how to manipulate the different properties of the Navigator object:
<!DOCTYPE html>
<html lang="en">
<head>
    <meta charset="UTF-8">
    <meta name="viewport" content="width=device-width, initial-scale=1.0">
    <title>Navigator Object Properties Example</title>
    <style>
        body {
            font-family: Arial, sans-serif;
        }
        .property {
            margin-bottom: 10px;
        }
    </style>
</head>
<body>
    <h1>Navigator Object Properties Example</h1>
    <div class="property">
        <strong>App Name:</strong> <span id="appName"></span>
    </div>
    <div class="property">
        <strong>App Version:</strong> <span id="appVersion"></span>
    </div>
    <div class="property">
        <strong>User Agent:</strong> <span id="userAgent"></span>
    </div>
    <div class="property">
        <strong>Platform:</strong> <span id="platform"></span>
    </div>
    <div class="property">
        <strong>Language:</strong> <span id="language"></span>
    </div>
    <div class="property">
        <strong>Online Status:</strong> <span id="onLine"></span>
    </div>
    <div class="property">
        <strong>Cookies Enabled:</strong> <span id="cookiesEnabled"></span>
    </div>
    <div class="property">
        <strong>Java Enabled:</strong> <span id="javaEnabled"></span>
    </div>
    <div class="property">
        <strong>Geolocation:</strong> <span id="geolocation"></span>
    </div>

    <script>
        // Display navigator properties
        document.getElementById('appName').textContent = navigator.appName;
        document.getElementById('appVersion').textContent = navigator.appVersion;
        document.getElementById('userAgent').textContent = navigator.userAgent;
        document.getElementById('platform').textContent = navigator.platform;
        document.getElementById('language').textContent = navigator.language;
        document.getElementById('onLine').textContent = navigator.onLine ? "Online" : "Offline";
        document.getElementById('cookiesEnabled').textContent = navigator.cookieEnabled ? "Yes" : "No";
        document.getElementById('javaEnabled').textContent = navigator.javaEnabled() ? "Yes" : "No";

        // Display geolocation (if available)
        if (navigator.geolocation) {
            navigator.geolocation.getCurrentPosition(function(position) {
                document.getElementById('geolocation').textContent = `Latitude: ${position.coords.latitude}, Longitude: ${position.coords.longitude}`;
            }, function(error) {
                document.getElementById('geolocation').textContent = `Error: ${error.message}`;
            });
        } else {
            document.getElementById('geolocation').textContent = "Geolocation not supported by this browser.";
        }
    </script>
</body>
</html>- App Name: The browser’s name is shown by the navigator.appName attribute.
- App Version: The browser’s version information is shown by the navigator.appVersion attribute.
- User Agent: The browser’s user agent string is shown by the navigator.userAgent field.
- Platform: The browser’s operating platform is shown by the navigator.platform property.
- Language: The user’s preferred language is shown by the navigator.language attribute.
- Online Status: The browser’s online status is shown by the navigator.onLine attribute.
- Cookies Enabled: The browser’s ability to accept cookies is indicated by the navigator.cookieEnabled attribute.
- Java Enabled: The navigator.javaEnabled method shows if the browser has Java enabled.
- Geolocation: If supported and allowed by the user, the navigator.geolocation property obtains the device’s current geographic position.
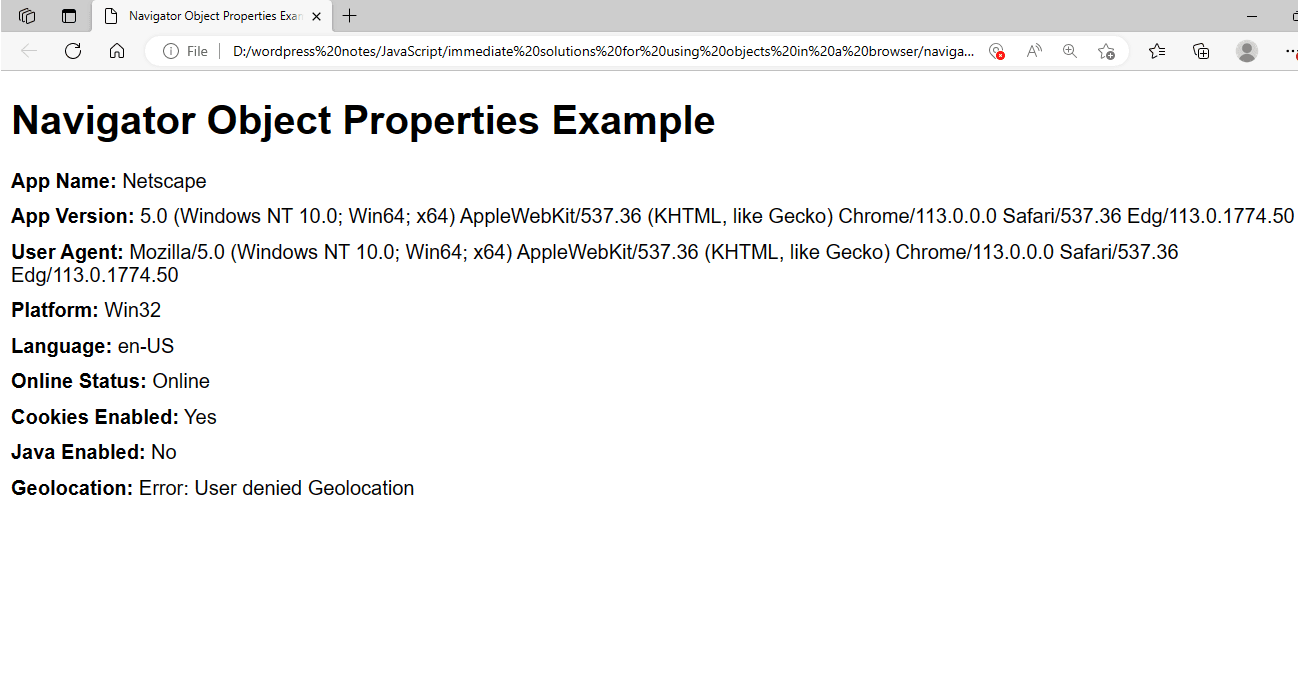
Figure 3 – Displaying the Output of Using the Navigator Object Properties in JavaScript
This example shows how to retrieve information about the browser and the user’s environment by accessing several properties of the Navigator object.
Working with the Navigator Object Methods:
JavaScript’s Navigator object has several methods for interacting with the user’s surroundings and the browser. This sample shows how to use several Navigator object functions, such as transferring data, vibrating the device, and checking for online status.
<!DOCTYPE html>
<html lang="en">
<head>
    <meta charset="UTF-8">
    <meta name="viewport" content="width=device-width, initial-scale=1.0">
    <title>Navigator Object Methods Example</title>
    <style>
        body {
            font-family: Arial, sans-serif;
        }
        .method {
            margin-bottom: 20px;
        }
        button {
            margin-top: 10px;
            margin-right: 10px;
        }
    </style>
</head>
<body>
    <h1>Navigator Object Methods Example</h1>

    <div class="method">
        <strong>Check Online Status:</strong>
        <button onclick="checkOnlineStatus()">Check Status</button>
        <div id="onlineStatus"></div>
    </div>

    <div class="method">
        <strong>Vibrate Device:</strong>
        <button onclick="vibrateDevice()">Vibrate</button>
    </div>

    <div class="method">
        <strong>Share Data:</strong>
        <button onclick="shareData()">Share</button>
        <div id="shareResult"></div>
    </div>

    <div class="method">
        <strong>Get Battery Status:</strong>
        <button onclick="getBatteryStatus()">Get Battery Status</button>
        <div id="batteryStatus"></div>
    </div>

    <script>
        // Check online status
        function checkOnlineStatus() {
            let status = navigator.onLine ? "Online" : "Offline";
            document.getElementById('onlineStatus').textContent = status;
        }

        // Vibrate device
        function vibrateDevice() {
            if (navigator.vibrate) {
                navigator.vibrate(1000); // Vibrate for 1 second
            } else {
                alert("Vibration API not supported.");
            }
        }

        // Share data
        function shareData() {
            if (navigator.share) {
                navigator.share({
                    title: 'Navigator API',
                    text: 'Check out the Navigator API methods!',
                    url: window.location.href
                }).then(() => {
                    document.getElementById('shareResult').textContent = 'Successfully shared!';
                }).catch((error) => {
                    document.getElementById('shareResult').textContent = 'Error sharing: ' + error;
                });
            } else {
                document.getElementById('shareResult').textContent = 'Web Share API not supported.';
            }
        }

        // Get battery status
        function getBatteryStatus() {
            if (navigator.getBattery) {
                navigator.getBattery().then(function(battery) {
                    let status = `Battery level: ${battery.level * 100}%`;
                    if (battery.charging) {
                        status += " (charging)";
                    }
                    document.getElementById('batteryStatus').textContent = status;
                });
            } else {
                document.getElementById('batteryStatus').textContent = 'Battery Status API not supported.';
            }
        }
    </script>
</body>
</html>- Utilizes the navigator to check the status online.Use the navigator.onLine property to determine whether the browser is online or not.
- Vibrate Device: navigator.vibrate is used to get the gadget to vibrate for a predetermined amount of time.
- Shared Data: Makes use of the navigator.share method: The Web Share API is used to exchange data.
- Check Battery Level: Makes use of the navigation.getbattery status information, use the getBattery function.
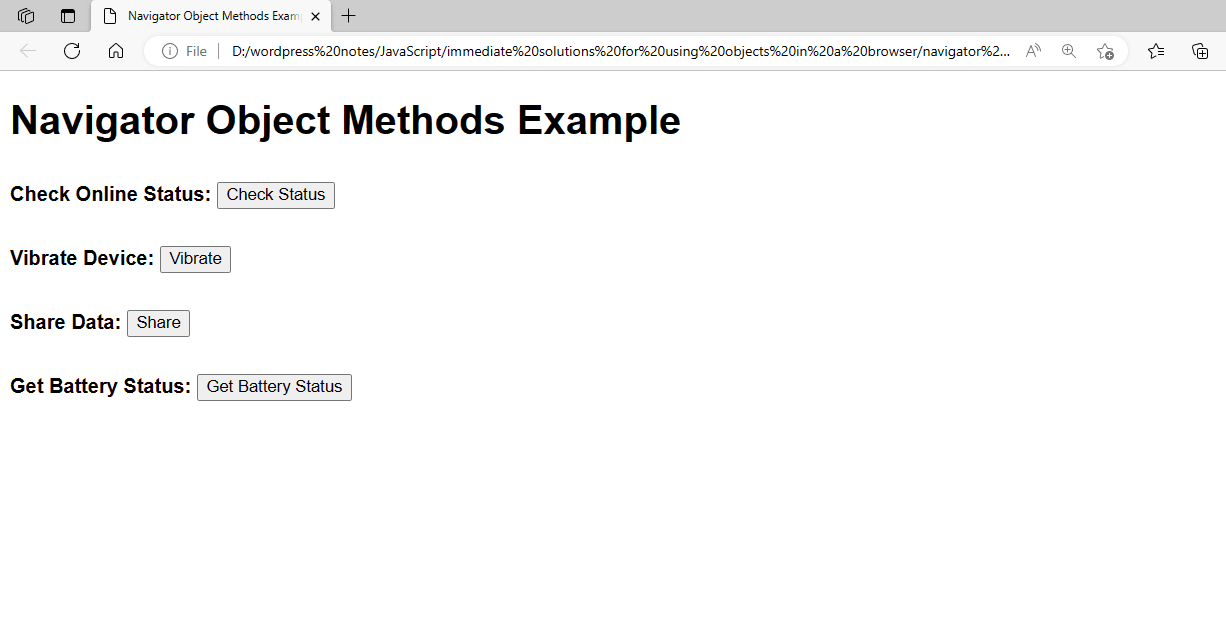
Figure 4 – Displaying the Output of Using the Navigator Object Method in JavaScript
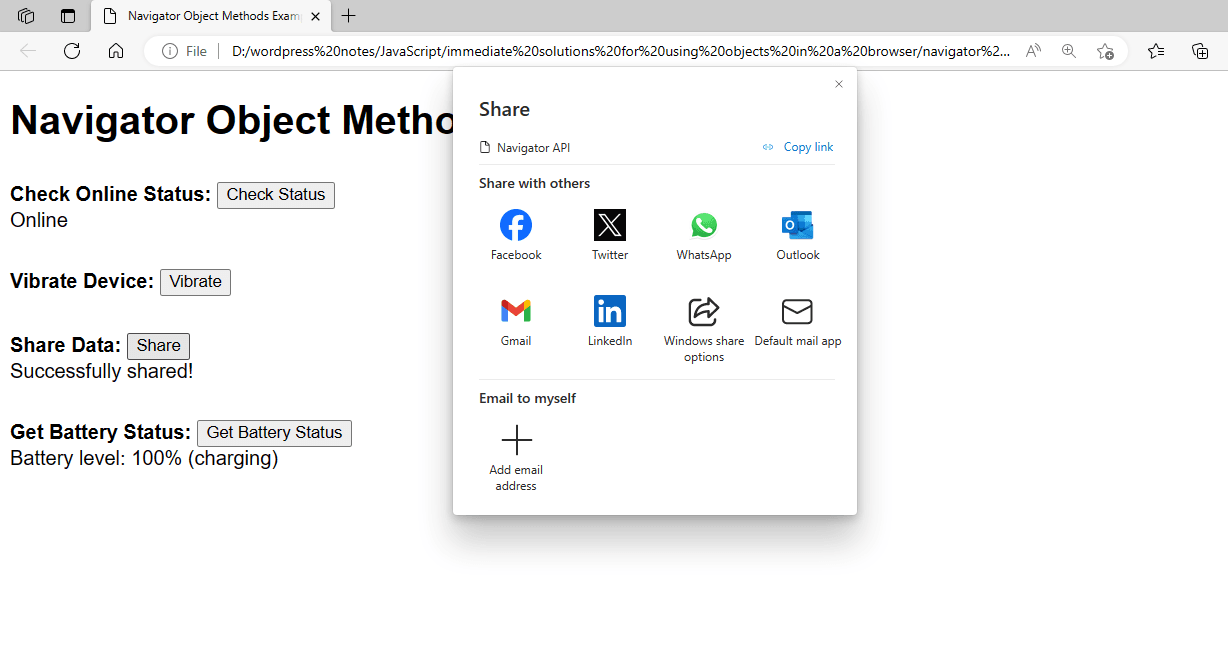
Figure 4.1 – Showing the Updated Page
This example shows how to connect with the browser and carry out tasks like sharing data, obtaining battery status, vibrating the device, and monitoring the internet status using different methods of the Navigator object.
Working with the History Object:
JavaScript’s History object lets you work with the browser’s session history, allowing you to change the history stack and go back and forth. This is a little example that shows you how to display the number of pages you have visited today using the history.length attribute. This example has a button that opens a new page (which is simulated by changing the URL) and a display that counts the number of pages that have been visited.
<!DOCTYPE html>
<html lang="en">
<head>
    <meta charset="UTF-8">
    <meta name="viewport" content="width=device-width, initial-scale=1.0">
    <title>Page Visit Tracker</title>
    <style>
        body {
            font-family: Arial, sans-serif;
            margin: 20px;
        }
        .method {
            margin-bottom: 20px;
        }
        button {
            margin-top: 10px;
            margin-right: 10px;
        }
    </style>
</head>
<body>
    <h1>Page Visit Tracker</h1>

    <div class="method">
        <button onclick="visitNewPage()">Visit New Page</button>
    </div>

    <div class="method">
        <strong>Total Pages Visited Today:</strong>
        <span id="pageCount">0</span>
    </div>

    <script>
        // Function to simulate visiting a new page
        function visitNewPage() {
            const page = history.length + 1;
            const state = { page: `Page ${page}` };
            const title = `Page ${page}`;
            const url = `#page${page}`;
            history.pushState(state, title, url);
            updatePageCount();
        }

        // Function to update the page count
        function updatePageCount() {
            document.getElementById('pageCount').textContent = history.length;
        }

        // Initial load page count
        document.addEventListener('DOMContentLoaded', function() {
            updatePageCount();
        });
    </script>
</body>
</html>- Visit New Page: The visitNewPage() function modifies the document title and URL hash, creating a new state with the page number to mimic visiting a new page. The page count is then updated.
- Update Page Count: The history.length property is used by the updatePageCount() function to update the number of visited pages that are displayed.
- Initial Load Page Count: The number of pages viewed thus far is reflected in the initial page count, updated when the page loads.
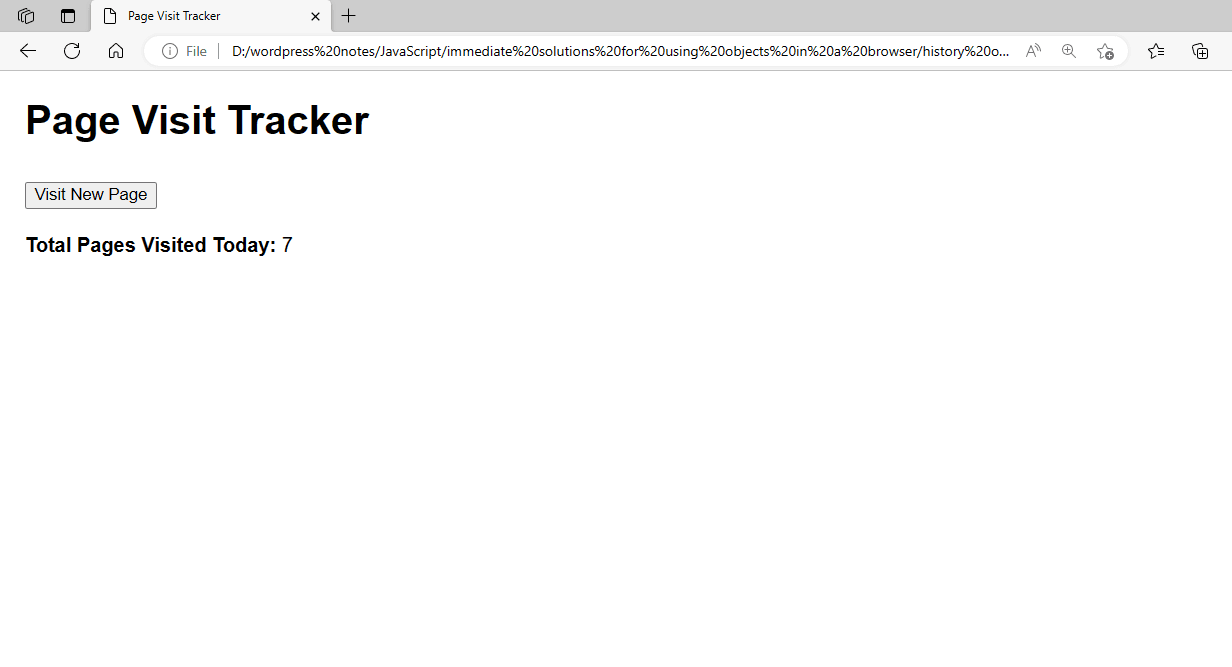
Figure 5 – Displaying the Output of Using the History Object in JavaScript
Using a basic example, you can see how to use the history.length property to track the number of pages viewed thus far today. New pages are “visited” (simulated by changing the URL), and the display is updated dynamically.
This is a basic example that shows you how to use the pushState and replaceState methods, as well as use the History object to travel through the browser’s history:
<!DOCTYPE html>
<html lang="en">
<head>
    <meta charset="UTF-8">
    <meta name="viewport" content="width=device-width, initial-scale=1.0">
    <title>Simple History Object Example</title>
    <style>
        body {
            font-family: Arial, sans-serif;
        }
        .method {
            margin-bottom: 20px;
        }
        button {
            margin-top: 10px;
            margin-right: 10px;
        }
    </style>
</head>
<body>
    <h1>Simple History Object Example</h1>

    <div class="method">
        <button onclick="goBack()">Go Back</button>
        <button onclick="goForward()">Go Forward</button>
    </div>

    <div class="method">
        <button onclick="pushStateExample()">Push State</button>
        <button onclick="replaceStateExample()">Replace State</button>
    </div>

    <div id="content">
        <h2>Home Page</h2>
        <p>This is the home page content.</p>
    </div>

    <script>
        // Navigate backward
        function goBack() {
            history.back();
        }

        // Navigate forward
        function goForward() {
            history.forward();
        }

        // Push state
        function pushStateExample() {
            const state = { page: "Page 1" };
            const title = "Page 1";
            const url = "page1.html";
            history.pushState(state, title, url);
            loadContent(state.page);
        }

        // Replace state
        function replaceStateExample() {
            const state = { page: "Page 2" };
            const title = "Page 2";
            const url = "page2.html";
            history.replaceState(state, title, url);
            loadContent(state.page);
        }

        // Load content based on state
        function loadContent(page) {
            let content = document.getElementById('content');
            if (page === "Page 1") {
                content.innerHTML = "<h2>Page 1</h2><p>This is the content for Page 1.</p>";
            } else if (page === "Page 2") {
                content.innerHTML = "<h2>Page 2</h2><p>This is the content for Page 2.</p>";
            } else {
                content.innerHTML = "<h2>Home Page</h2><p>This is the home page content.</p>";
            }
        }

        // Listen for popstate event
        window.addEventListener('popstate', function(event) {
            if (event.state) {
                loadContent(event.state.page);
            } else {
                loadContent(null);
            }
        });
    </script>
</body>
</html>- Go Back and Go Forward: These buttons allow you to go through your browser’s history by using the history.back() and history.forward() methods.
- Press State: This button makes use of the past.To add a new state to the history stack, use the pushState() method. Depending on the state, the page content is updated.
- Replace State: This button replaces the current state in the history stack by using the history.replaceState() method. Depending on the state, the page content is updated.
- Load Content Based on State: Using the current state as a basis, this function modifies the page’s content.
- Popstate Event: Upon modification of the active history entry, this event listener refreshes the page content.
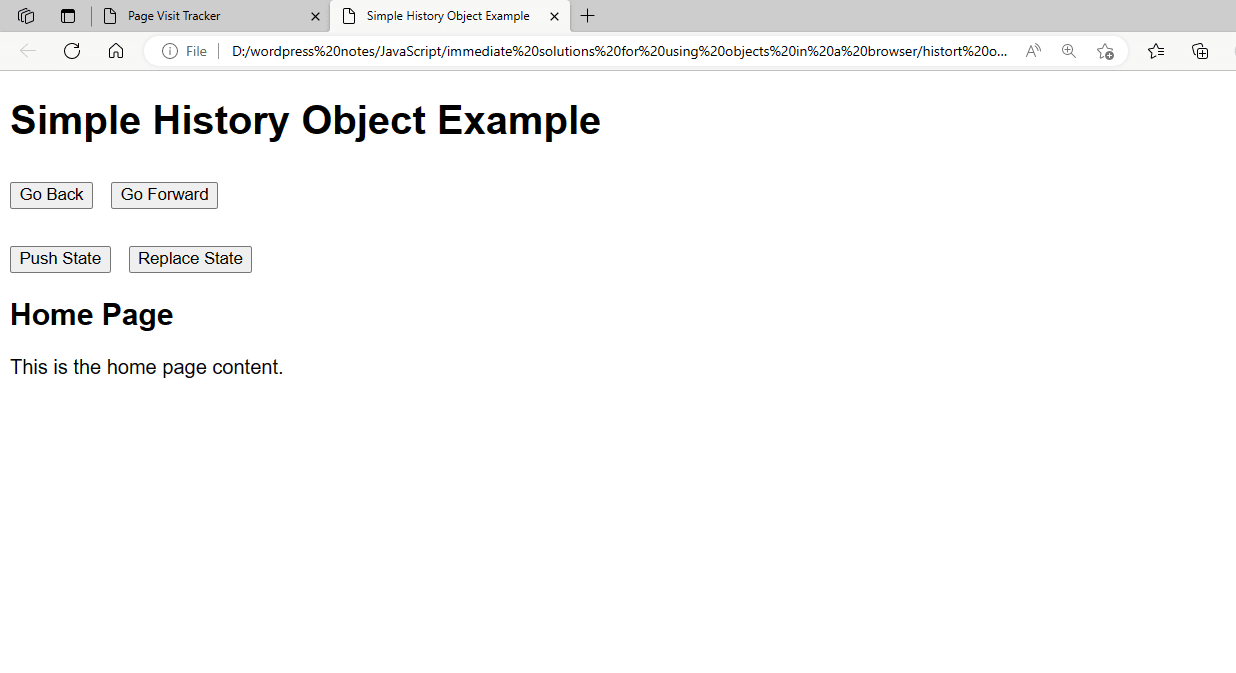
Figure 5.1 – Showing Other History Object Methods
This straightforward example shows how to change the history stack using the pushState and replaceState methods, as well as how to traverse backward and forth using the History object. The content of the page is dynamic and adapts to the current situation.
Working with a Screen Object:
Details about the user’s screen may be found in the Screen object. Property values such as screen width, height, color depth, pixel depth, and available width and height are included in this information. A basic example showing how to display screen properties and adjust the display when the screen size changes using the Screen object is provided below.
<!DOCTYPE html>
<html lang="en">
<head>
    <meta charset="UTF-8">
    <meta name="viewport" content="width=device-width, initial-scale=1.0">
    <title>Screen Object Example</title>
    <style>
        body {
            font-family: Arial, sans-serif;
            margin: 20px;
        }
        .property {
            margin-bottom: 10px;
        }
    </style>
</head>
<body>
    <h1>Screen Object Example</h1>

    <div class="property">
        <strong>Screen Width:</strong> <span id="screenWidth"></span>
    </div>
    <div class="property">
        <strong>Screen Height:</strong> <span id="screenHeight"></span>
    </div>
    <div class="property">
        <strong>Available Width:</strong> <span id="availWidth"></span>
    </div>
    <div class="property">
        <strong>Available Height:</strong> <span id="availHeight"></span>
    </div>
    <div class="property">
        <strong>Color Depth:</strong> <span id="colorDepth"></span>
    </div>
    <div class="property">
        <strong>Pixel Depth:</strong> <span id="pixelDepth"></span>
    </div>

    <script>
        // Function to update screen properties display
        function updateScreenProperties() {
            document.getElementById('screenWidth').textContent = screen.width;
            document.getElementById('screenHeight').textContent = screen.height;
            document.getElementById('availWidth').textContent = screen.availWidth;
            document.getElementById('availHeight').textContent = screen.availHeight;
            document.getElementById('colorDepth').textContent = screen.colorDepth;
            document.getElementById('pixelDepth').textContent = screen.pixelDepth;
        }

        // Initial load of screen properties
        document.addEventListener('DOMContentLoaded', function() {
            updateScreenProperties();
        });

        // Update screen properties when the window is resized
        window.addEventListener('resize', function() {
            updateScreenProperties();
        });
    </script>
</body>
</html>- Show Screen Properties: To display the properties, the updateScreenProperties() function gets the properties from the Screen object and modifies the HTML elements that correspond to them.
- First Load: The screen properties are modified as soon as the document loads.
- Window Resize Event: Whenever the window is resized, the screen properties are modified to reflect the available dimensions and the screen size that is currently displayed.
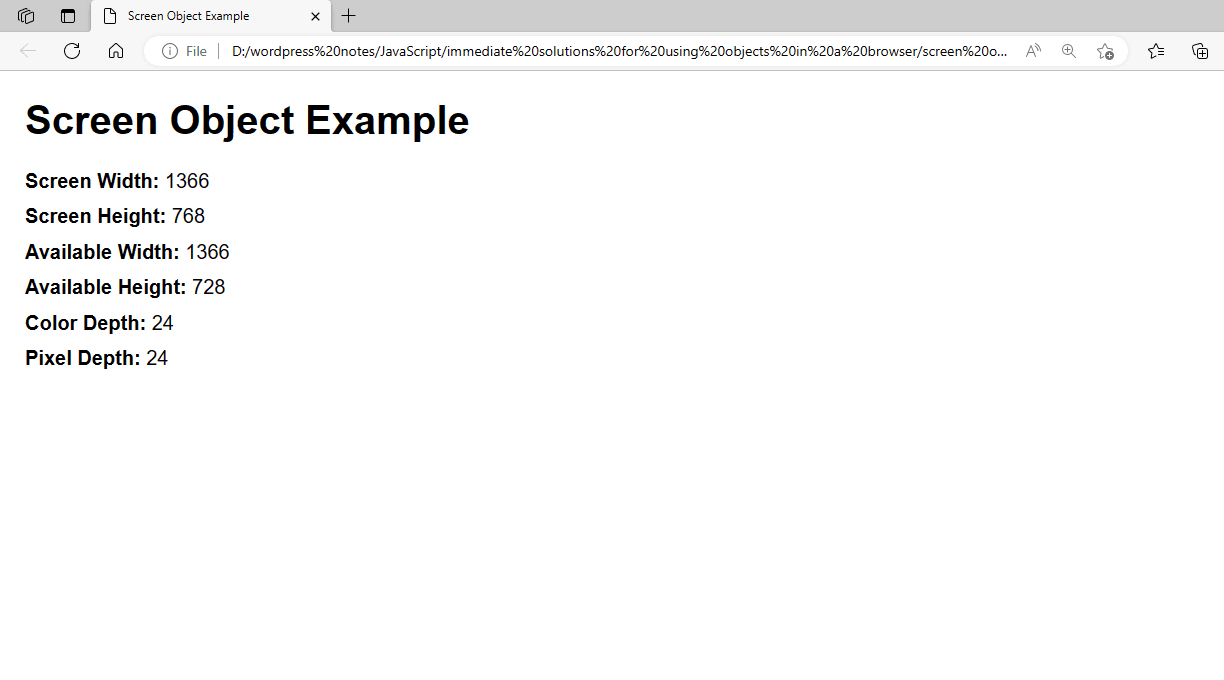
Figure 6 – Displaying the Output of Using the Screen Object in JavaScript
This straightforward sample demonstrates how to access and display different screen attributes using the Screen object. A change in screen size causes a dynamic update of the attributes.
Working with the Location Object:
The location object offers ways to work with the current URL as well as information about it. With this object, which is a component of the Windows interface, you can interact with attributes like hash, search, href, protocol, host, pathname, and more. It also has functions like replace(), reload(), and assign(). This is an example that shows you how to display and change different URL components using the location object.
<!DOCTYPE html>
<html lang="en">
<head>
    <meta charset="UTF-8">
    <meta name="viewport" content="width=device-width, initial-scale=1.0">
    <title>Location Object Example</title>
    <style>
        body {
            font-family: Arial, sans-serif;
            margin: 20px;
        }
        .property {
            margin-bottom: 10px;
        }
        button {
            margin-top: 10px;
            margin-right: 10px;
        }
    </style>
</head>
<body>
    <h1>Location Object Example</h1>

    <div class="property">
        <strong>Full URL (href):</strong> <span id="href"></span>
    </div>
    <div class="property">
        <strong>Protocol:</strong> <span id="protocol"></span>
    </div>
    <div class="property">
        <strong>Host:</strong> <span id="host"></span>
    </div>
    <div class="property">
        <strong>Hostname:</strong> <span id="hostname"></span>
    </div>
    <div class="property">
        <strong>Port:</strong> <span id="port"></span>
    </div>
    <div class="property">
        <strong>Pathname:</strong> <span id="pathname"></span>
    </div>
    <div class="property">
        <strong>Search Query:</strong> <span id="search"></span>
    </div>
    <div class="property">
        <strong>Hash:</strong> <span id="hash"></span>
    </div>

    <button onclick="updateHash()">Update Hash</button>
    <button onclick="reloadPage()">Reload Page</button>
    <button onclick="goToPage()">Go to New Page</button>

    <script>
        // Function to update the display of location properties
        function updateLocationProperties() {
            document.getElementById('href').textContent = location.href;
            document.getElementById('protocol').textContent = location.protocol;
            document.getElementById('host').textContent = location.host;
            document.getElementById('hostname').textContent = location.hostname;
            document.getElementById('port').textContent = location.port;
            document.getElementById('pathname').textContent = location.pathname;
            document.getElementById('search').textContent = location.search;
            document.getElementById('hash').textContent = location.hash;
        }

        // Function to update the hash part of the URL
        function updateHash() {
            location.hash = '#newHash';
            updateLocationProperties();
        }

        // Function to reload the page
        function reloadPage() {
            location.reload();
        }

        // Function to navigate to a new page
        function goToPage() {
            location.assign('https://www.example.com');
        }

        // Initial load of location properties
        document.addEventListener('DOMContentLoaded', function() {
            updateLocationProperties();
        });

        // Update location properties when hash changes
        window.addEventListener('hashchange', function() {
            updateLocationProperties();
        });
    </script>
</body>
</html>- Display Location Properties: To display location properties, the updateLocationProperties() function modifies the necessary HTML elements by retrieving properties from the location object.
- Update Hash: The updateHash() function modifies the characteristics that are displayed and changes the hash portion of the URL to #newHash.
- Reload Page: The current page is reloaded using the reloadPage() function.
- Go to the new page: The location.assign() method is used by the goToPage() function to move to a new page.
- First Load and Hash Change: The location properties are first modified upon document loading. To update the attributes whenever the hash portion of the URL changes, an event listener is also added.
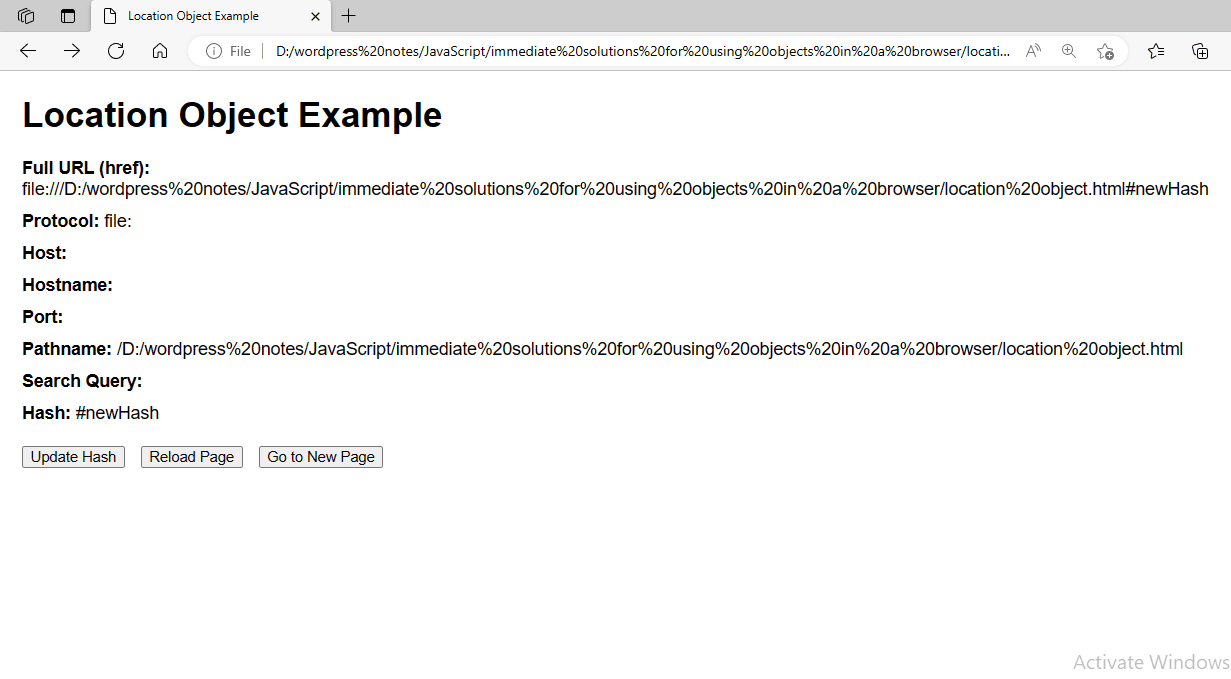
Figure 7 – Displaying the Output of Using the Location Object in JavaScript
This example shows how to dynamically update the displayed attributes in response to changes made to the URL and access and modify different parts of the URL using the location object.