Quick Solutions:
Quick Solutions for JavaScript Overview: To begin, first refer – in-depth-overview-of-javascript
Incorporating JavaScript in the Head Element:
A standard method for loading scripts required for the page is to include JavaScript in the <head> element of an HTML document. As an illustration of how to achieve it, consider this:
In this example, JavaScript is written directly within the <head> section:
<!DOCTYPE html>
<html lang="en">
<head>
    <meta charset="UTF-8">
    <meta name="viewport" content="width=device-width, initial-scale=1.0">
    <title>Internal JavaScript Example</title>
    <script>
        // Internal JavaScript code
        function showAlert() {
            alert("Hello from the head element!");
        }
    </script>
</head>
<body>
    <h1>Welcome to My Website</h1>
    <button onclick="showAlert()">Click Me</button>
</body>
</html>
The showAlert function in this example is defined in the <head> section. The showAlert function is called when the button is clicked, causing an alarm message to be shown.
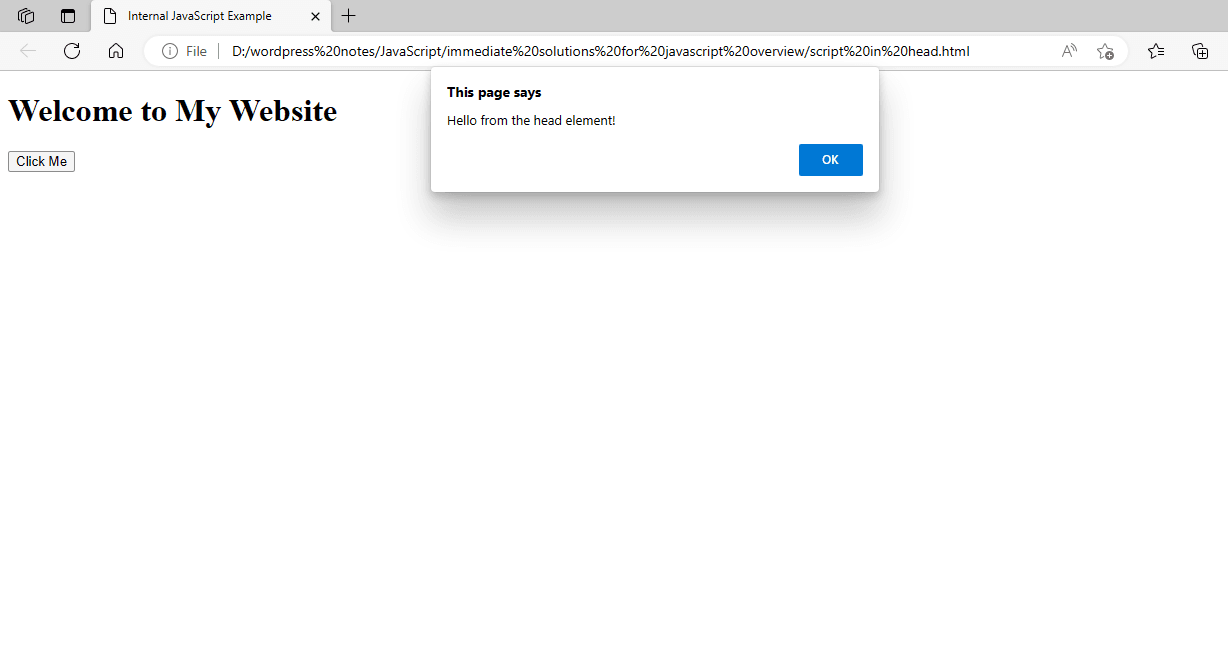
Figure 1 – Displaying the Output of Incorporating JavaScript in the Head Element
Incorporating JavaScript in the Body Element:
Another widely used method is to include JavaScript in the <body> element, particularly if you want to ensure the script executes after the HTML content has finished loading. By doing this, problems with DOM element access before creation may be avoided.
Here’s an example where JavaScript is written directly within the <body> section:
<!DOCTYPE html>
<html lang="en">
<head>
    <meta charset="UTF-8">
    <meta name="viewport" content="width=device-width, initial-scale=1.0">
    <title>Internal JavaScript in Body Example</title>
</head>
<body>
    <h1>Welcome to My Website</h1>
    <button id="myButton">Click Me</button>

    <script>
        // JavaScript code within the body
        document.getElementById('myButton').addEventListener('click', function() {
            alert('Hello from the body element!');
        });
    </script>
</body>
</html>
The ending </body> element is immediately preceded by the JavaScript code in this example. In this way, the script will only execute once the button element has been made available and the full HTML text has been parsed.
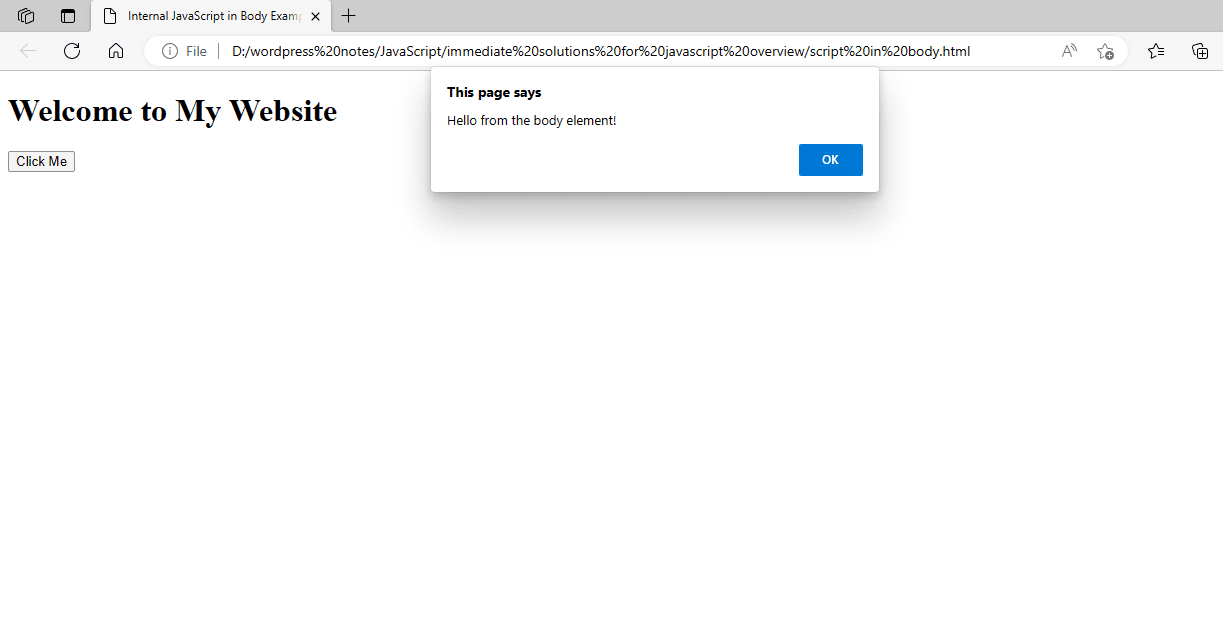
Figure 2- Displaying the Output of Incorporating JavaScript in the Body Element.
Using an External Javascript File:
Now, let’s see an example with an external JavaScript file:
First, make a JavaScript file externally: Put the following code into a myscript.js file.
// script.js
document.getElementById('myButton').addEventListener('click', function() {
    alert('Hello from an external script in the body element!');
});
Now, link the external JavaScript file in the HTML document:
<!DOCTYPE html>
<html lang="en">
<head>
    <meta charset="UTF-8">
    <meta name="viewport" content="width=device-width, initial-scale=1.0">
    <title>External JavaScript in Body Example</title>
</head>
<body>
    <h1>Welcome to My Website</h1>
    <button id="myButton">Click Me</button>

    <script src="myscript.js"></script>
</body>
</html>
The external JavaScript file script.js is connected after the <body> section in this example. This guarantees that the script executes following the HTML content’s complete loading, enabling safe interaction with the DOM elements.
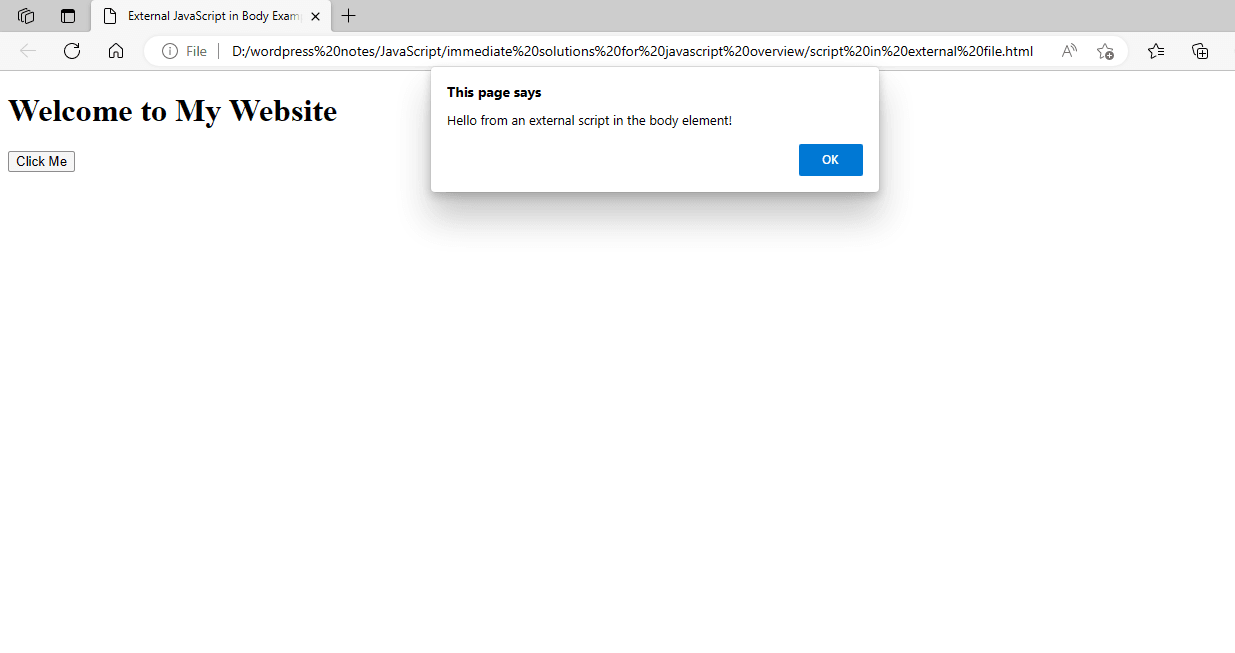
Figure 3 – Displaying the Output of Using an External Javascript File
External Scripts: Especially for larger projects, it is helpful to maintain clean, modular code by linking external scripts at the end of the <body> section.
JavaScript should always be placed after the <body> section to avoid typical problems with script execution-related access issues to DOM elements. The user sees the HTML content before the script executes, which contributes to the improved perceived performance of the page.
Using Variables:
In JavaScript, assigning values to variables enables you to manage and manipulate data dynamically within your script. This is a thorough example showing how to assign and alter values using variables.
Let’s develop an HTML document that assigns and updates variable values based on user input using JavaScript.
<!DOCTYPE html>
<html lang="en">
<head>
    <meta charset="UTF-8">
    <meta name="viewport" content="width=device-width, initial-scale=1.0">
    <title>Assigning and Updating Variables in JavaScript</title>
</head>
<body>
    <h1>Variable Assignment Example</h1>
    <label for="nameInput">Enter your name:</label>
    <input type="text" id="nameInput">
    <button id="greetButton">Greet Me</button>
    <p id="greetingMessage"></p>

    <script>
        // Initializing variables
        let userName = "";
        const button = document.getElementById('greetButton');
        const nameInput = document.getElementById('nameInput');
        const messageParagraph = document.getElementById('greetingMessage');

        // Function to update the userName variable and display the greeting message
        function updateGreeting() {
            userName = nameInput.value; // Assigning the input value to the userName variable
            if (userName) {
                messageParagraph.textContent = `Hello, ${userName}! Welcome to my website.`;
            } else {
                messageParagraph.textContent = "Please enter your name.";
            }
        }

        // Adding an event listener to the button
        button.addEventListener('click', updateGreeting);
    </script>
</body>
</html>- Variables are used to hold data that can be changed and assigned again. In this example, variables that reference DOM elements that are not changing are written in const, and variables that change are written in let.
- Accessing and Updating Values: When the button is clicked, the value from the input field is updated in the userName variable.
- Conditional statements: These are used to show the relevant messages and determine whether the userName is empty.
- Event listeners: Make the webpage dynamic and interactive by enabling you to take actions in response to user interactions.
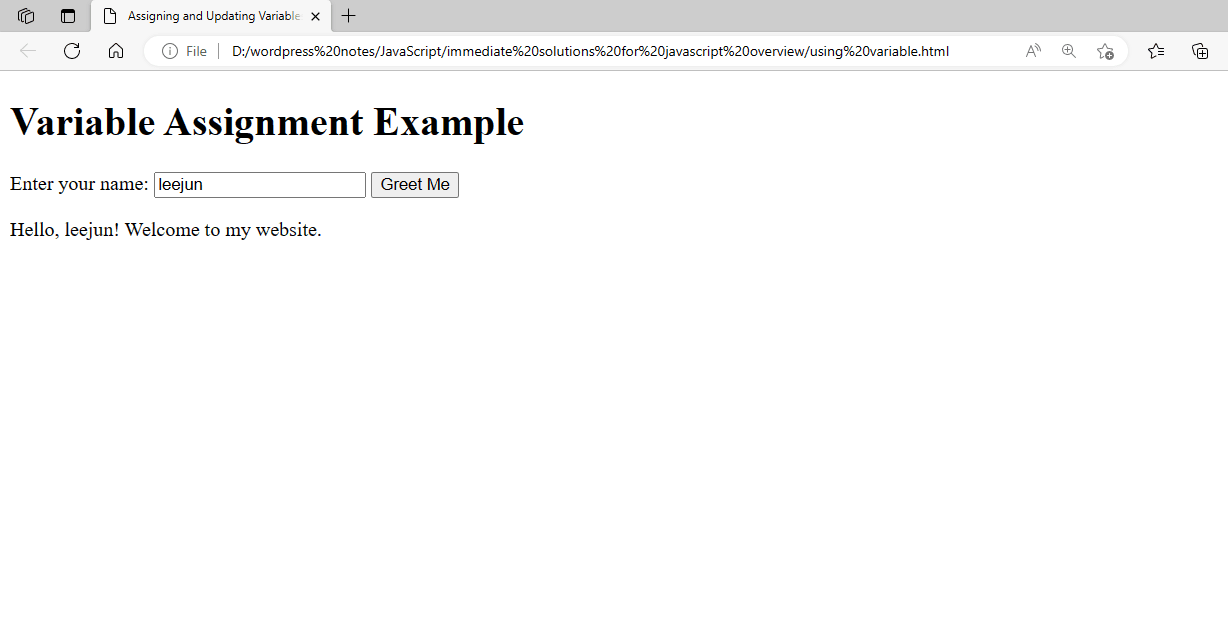
Figure 4 – Displaying the Output of Using Variables
You may build dynamic, interactive web apps that react to user input and actions by utilizing variables to store and alter values.
Using Operators:
JavaScript operators let you work with variables and values in a variety of ways. Arithmetic, assignment, comparison, logic, and other types of operators are all included in this category. Now let’s build an example to show how to use JavaScript’s arithmetic, assignment, comparison, and logical operators. This example will use user input to compute the area of a rectangle, compare that result to a preset value, and display a message if necessary.
Here’s an HTML document that incorporates JavaScript to demonstrate different types of operators.
<!DOCTYPE html>
<html lang="en">
<head>
    <meta charset="UTF-8">
    <meta name="viewport" content="width=device-width, initial-scale=1.0">
    <title>Using Various Operators in JavaScript</title>
</head>
<body>
    <h1>Rectangle Area Calculator</h1>
    <label for="lengthInput">Enter length:</label>
    <input type="number" id="lengthInput">
    <br>
    <label for="widthInput">Enter width:</label>
    <input type="number" id="widthInput">
    <br>
    <button id="calculateButton">Calculate Area</button>
    <p id="resultMessage"></p>

    <script>
        // Predefined area for comparison
        const predefinedArea = 50;

        // Function to calculate the area of a rectangle
        function calculateArea() {
            // Getting values from input fields
            let length = parseFloat(document.getElementById('lengthInput').value);
            let width = parseFloat(document.getElementById('widthInput').value);

            // Using arithmetic operators to calculate the area
            let area = length * width;

            // Using comparison operators to compare the calculated area with the predefined area
            let isLarger = area > predefinedArea;

            // Using assignment operator to store the result message
            let message;
            if (isLarger) {
                // Using logical operator (AND) to check if both length and width are positive
                if (length > 0 && width > 0) {
                    message = `The area of the rectangle is ${area}, which is larger than ${predefinedArea}.`;
                } else {
                    message = "Please enter positive values for length and width.";
                }
            } else {
                message = `The area of the rectangle is ${area}, which is not larger than ${predefinedArea}.`;
            }

            // Displaying the result message
            document.getElementById('resultMessage').textContent = message;
        }

        // Adding an event listener to the button
        document.getElementById('calculateButton').addEventListener('click', calculateArea);
    </script>
</body>
</html>- Arithmetic operators are used to carry out operations in mathematics, such as multiplication (*).
- Comparing values and returning a Boolean result (>) is done with comparison operators.
- Logical operators are used to carry out actions that make sense, like determining whether two or more conditions are true (&&).
- Assignment operators are used to give variable values (=).
- Content: To show the result message, the content inside the
- element is updated using the textContent property.
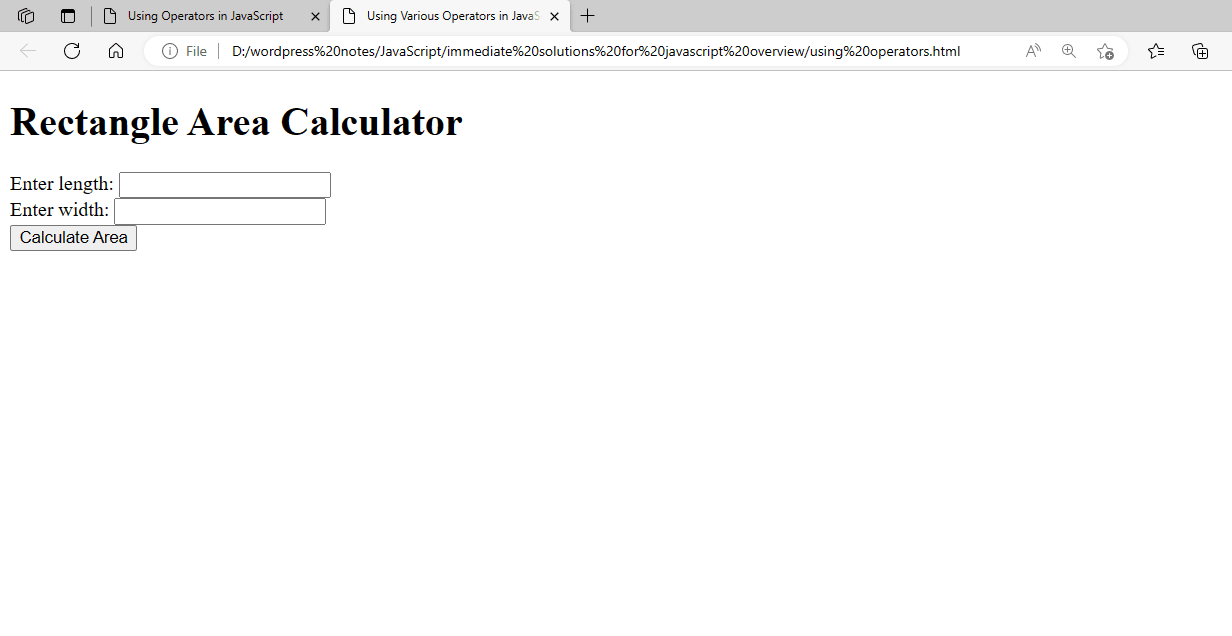
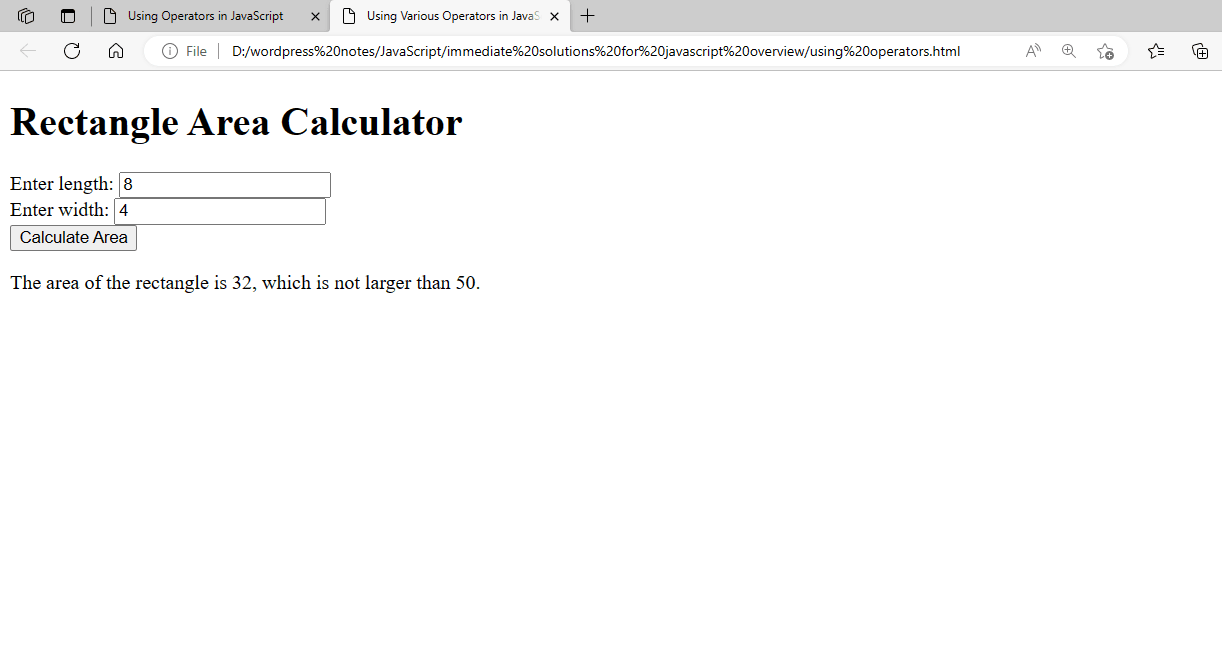
Figure 5 – Displaying the Output of Using Operators
Your JavaScript code can become dynamic and interactive by performing a variety of operations on variables and values through the effective use of operators.
Using the IF Statement:
In JavaScript, an if statement is used to only run a block of code if a given condition is met. This is a basic example that shows how to utilize the if statement.
Let’s create an HTML document that uses JavaScript to check a condition and display a message based on the result.
<!DOCTYPE html>
<html lang="en">
<head>
    <meta charset="UTF-8">
    <meta name="viewport" content="width=device-width, initial-scale=1.0">
    <title>Using the if Statement in JavaScript</title>
</head>
<body>
    <h1>Check Your Age</h1>
    <label for="ageInput">Enter your age:</label>
    <input type="number" id="ageInput">
    <button id="checkAgeButton">Check</button>
    <p id="resultMessage"></p>

    <script>
        function checkAge() {
            // Get the value from the input field
            let age = parseInt(document.getElementById('ageInput').value);

            // Use the if statement to check the age
            if (age >= 18) {
                document.getElementById('resultMessage').textContent = "You are an adult.";
            } else {
                document.getElementById('resultMessage').textContent = "You are a minor.";
            }
        }

        // Add an event listener to the button
        document.getElementById('checkAgeButton').addEventListener('click', checkAge);
    </script>
</body>
</html>- If a given condition is met, the if statement runs a block of code. If the condition is false, the code can be executed using an optional else block.
- Event Listener: This component reacts to user input, like clicking a button, to start JavaScript scripts.
- DOM manipulation: dynamically changes an HTML element’s content according to predetermined criteria.
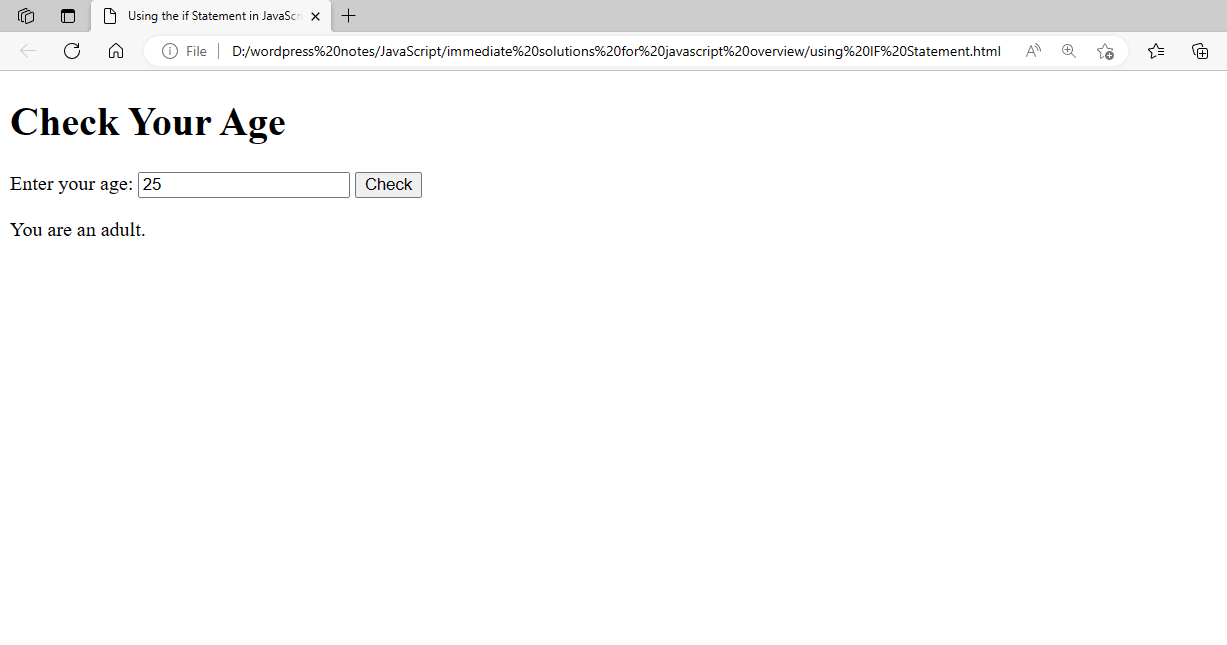
Figure 6 – Displaying the Output of Using the IF Statement
This example shows how to implement conditional reasoning depending on user input using the if statement in JavaScript.
Using the If…else Statement:
If a condition is true, JavaScript’s if…else statement lets you run one block of code; if it’s false, it runs a different chunk of code. This example shows how to use the if…else statement:
Let’s create an HTML document that uses JavaScript to check a condition and display a message based on whether a number is positive, negative, or zero.
<!DOCTYPE html>
<html lang="en">
<head>
    <meta charset="UTF-8">
    <meta name="viewport" content="width=device-width, initial-scale=1.0">
    <title>Using the if...else Statement in JavaScript</title>
</head>
<body>
    <h1>Check Number</h1>
    <label for="numberInput">Enter a number:</label>
    <input type="number" id="numberInput">
    <button id="checkNumberButton">Check</button>
    <p id="resultMessage"></p>

    <script>
        function checkNumber() {
            // Get the value from the input field
            let number = parseInt(document.getElementById('numberInput').value);

            // Use the if...else statement to check the number
            if (number > 0) {
                document.getElementById('resultMessage').textContent = "The number is positive.";
            } else if (number < 0) {
                document.getElementById('resultMessage').textContent = "The number is negative.";
            } else {
                document.getElementById('resultMessage').textContent = "The number is zero.";
            }
        }

        // Add an event listener to the button
        document.getElementById('checkNumberButton').addEventListener('click', checkNumber);
    </script>
</body>
</html>- If not, then Statement: If a certain condition is true, then one block of code is executed; if the condition is false, then another block of code is executed.
- else if enables you to verify additional criteria if the previous condition is not true.
- If any of the aforementioned conditions are not met, the default action is taken.
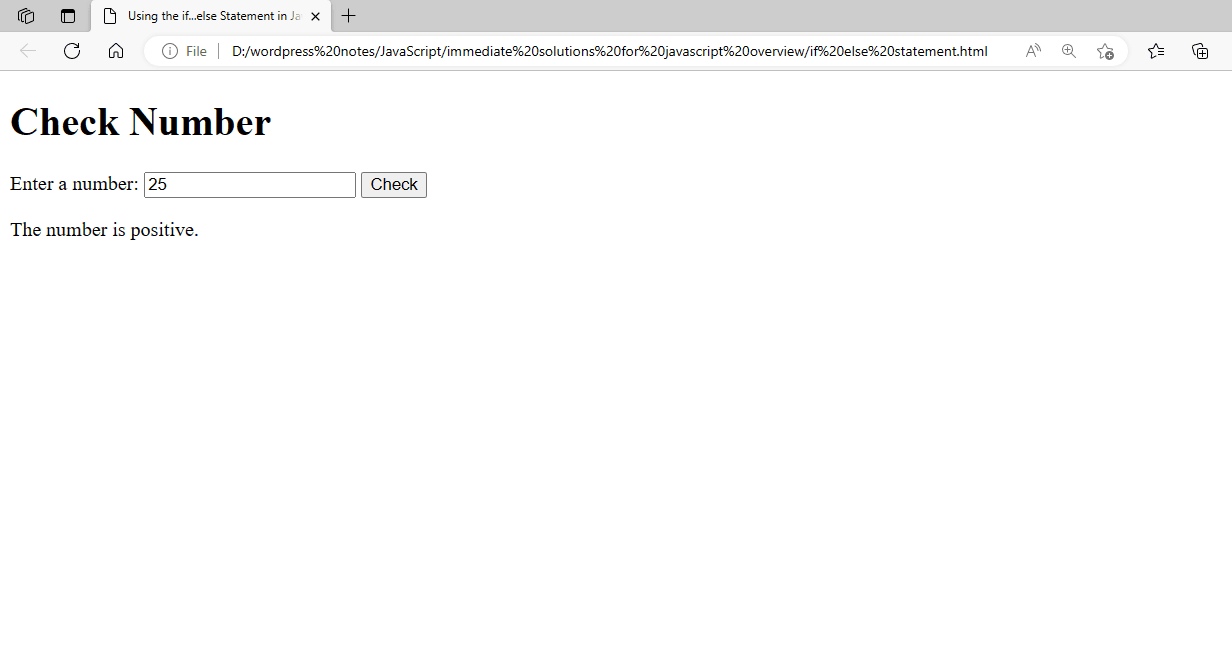
Figure 7 – Displaying the Output of Using the If-Else Statement
Here’s an example of using the if…else statement to execute several commands depending on the value of a user-inputted number.
Using the Nested If…else Statement:
Multiple levels of criteria are possible in JavaScript when using the nested if…else expression. This implies that an if statement may be contained inside another if or else block. The following example shows how to use nested if…else statements:
Let’s develop an HTML document that utilizes JavaScript to calculate a student’s mark depending on their score, applying various grading standards to varying score ranges.
<!DOCTYPE html>
<html lang="en">
<head>
    <meta charset="UTF-8">
    <meta name="viewport" content="width=device-width, initial-scale=1.0">
    <title>Using Nested if...else Statements in JavaScript</title>
</head>
<body>
    <h1>Grade Calculator</h1>
    <label for="scoreInput">Enter your score:</label>
    <input type="number" id="scoreInput">
    <button id="calculateGradeButton">Calculate Grade</button>
    <p id="gradeMessage"></p>

    <script>
        function calculateGrade() {
            // Get the value from the input field
            let score = parseInt(document.getElementById('scoreInput').value);
            let grade;

            // Use nested if...else statements to calculate the grade
            if (score >= 90) {
                grade = 'A';
            } else if (score >= 80) {
                grade = 'B';
            } else if (score >= 70) {
                grade = 'C';
            } else if (score >= 60) {
                grade = 'D';
            } else {
                grade = 'F';
            }

            // Display the grade message
            document.getElementById('gradeMessage').textContent = `Your grade is ${grade}.`;
        }

        // Add an event listener to the button
        document.getElementById('calculateGradeButton').addEventListener('click', calculateGrade);
    </script>
</body>
</html>- nested if-else: makes it possible to check conditions at different levels.
- By default, if any of the preceding conditions are false, the code executes.
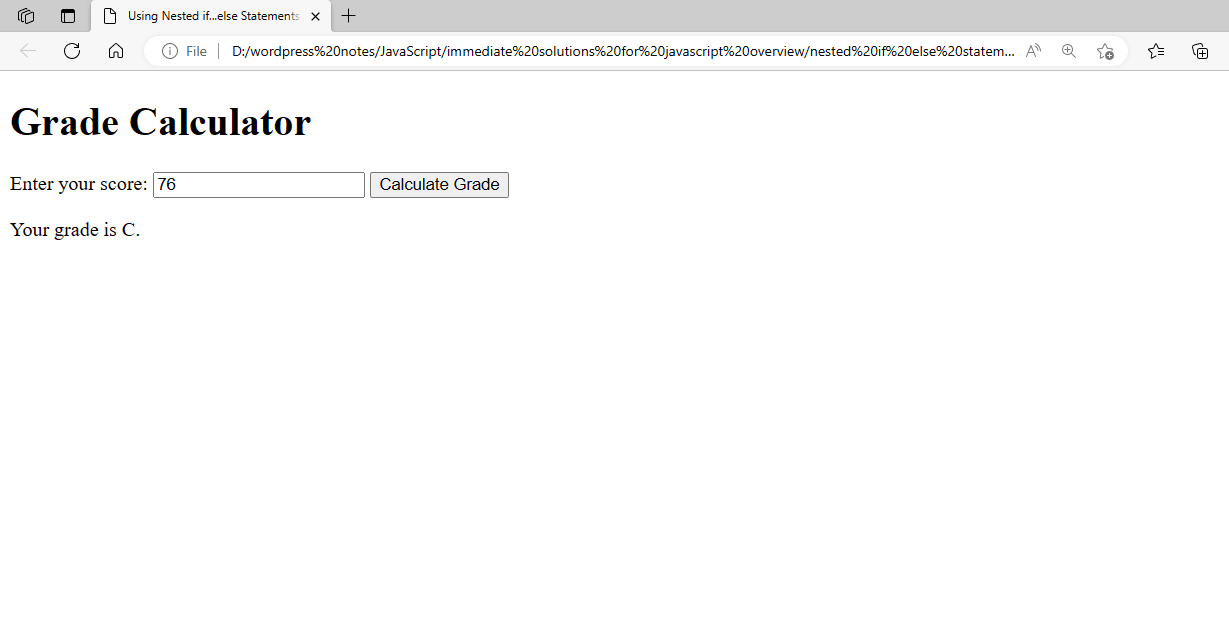
Figure 8 – Displaying the Output of Using the Nested If-Else Statement
This example shows how to compute and display a student’s grade based on their score using nested if…else statements.
Using the Switch Statement:
In JavaScript, the switch statement is used to execute several operations according to various criteria. It frequently serves as a substitute for lengthy if…else if…else chains. Here’s an illustration of how to utilize the switch statement:
Let’s develop an HTML document that uses a switch statement and JavaScript to determine the day of the week given a numerical input.
<!DOCTYPE html>
<html lang="en">
<head>
    <meta charset="UTF-8">
    <meta name="viewport" content="width=device-width, initial-scale=1.0">
    <title>Using the switch Statement in JavaScript</title>
</head>
<body>
    <h1>Day of the Week</h1>
    <label for="dayInput">Enter a number (1-7):</label>
    <input type="number" id="dayInput">
    <button id="checkDayButton">Check Day</button>
    <p id="dayMessage"></p>

    <script>
        function checkDay() {
            // Get the value from the input field
            let dayNumber = parseInt(document.getElementById('dayInput').value);
            let dayName;

            // Use a switch statement to determine the day
            switch (dayNumber) {
                case 1:
                    dayName = 'Sunday';
                    break;
                case 2:
                    dayName = 'Monday';
                    break;
                case 3:
                    dayName = 'Tuesday';
                    break;
                case 4:
                    dayName = 'Wednesday';
                    break;
                case 5:
                    dayName = 'Thursday';
                    break;
                case 6:
                    dayName = 'Friday';
                    break;
                case 7:
                    dayName = 'Saturday';
                    break;
                default:
                    dayName = 'Invalid day number';
            }

            // Display the day message
            document.getElementById('dayMessage').textContent = `Day ${dayNumber} is ${dayName}.`;
        }

        // Add an event listener to the button
        document.getElementById('checkDayButton').addEventListener('click', checkDay);
    </script>
</body>
</html>- switch Statement: Runs a block of code in response to several scenarios.
- case: In the switch statement, define a case.
- break: Leaves the block and ends the switch statement.
- default: Defines the code to execute if no case matches.
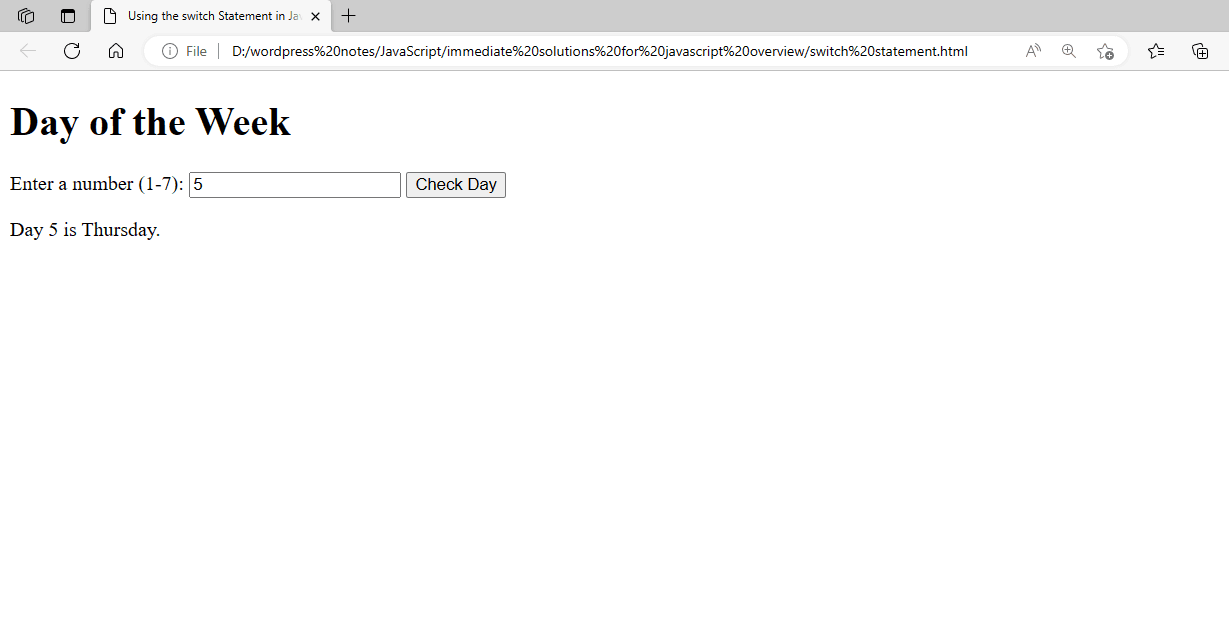
Figure 9 – Displaying the Output of the Switch Statement
This example shows you how to utilize a number input to determine the day of the week using the switch statement.
Using the While Loop:
JavaScript’s while loop repeatedly runs a block of code as long as a given condition is met. Here’s an example of counting from 1 to 5 using a while loop:
<!DOCTYPE html>
<html lang="en">
<head>
    <meta charset="UTF-8">
    <meta name="viewport" content="width=device-width, initial-scale=1.0">
    <title>Using the while Loop in JavaScript</title>
</head>
<body>
    <h1>Counting with a While Loop</h1>
    <p id="countingResult"></p>

    <script>
        let count = 1;
        let result = '';

        while (count <= 5) {
            result += `${count} `;
            count++;
        }

        document.getElementById('countingResult').textContent = `Counting: ${result}`;
    </script>
</body>
</html>- For as long as the given condition (count <= 5 in this case) holds true, the while loop will keep iterating.
- To prevent an infinite loop, it’s crucial to make sure the condition ultimately turns false.
- To finally break the loop, you usually have a mechanism inside the loop to update the condition (for example, by increasing or decreasing a variable).
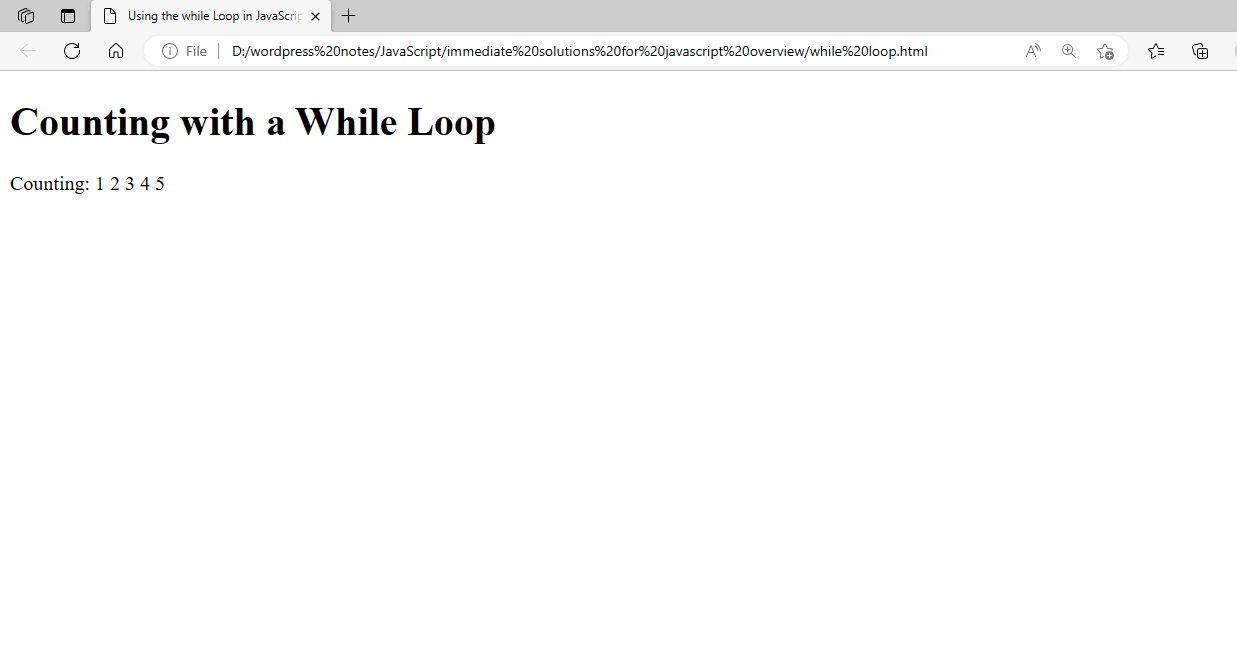
Figure 10 – Displaying the Output of Using While Loop
As long as a condition is met, this example shows how to utilize a while loop to carry out a repeated operation, like counting.
Using the Do…While Loop:
One significant distinction separates the JavaScript do…while loop from the while loop: the former always runs the code block at least once before determining if the condition is true. This example asks the user to predict a random number between 1 and 10 that is generated using a do…while loop. Until the user guesses right, the cycle keeps going.
Guess the Number Game using do…while loop:
<!DOCTYPE html>
<html lang="en">
<head>
    <meta charset="UTF-8">
    <meta name="viewport" content="width=device-width, initial-scale=1.0">
    <title>Guess the Number Game</title>
</head>
<body>
    <h1>Guess the Number!</h1>
    <p>I'm thinking of a number between 1 and 10. Can you guess it?</p>
    <input type="number" id="guessInput">
    <button id="guessButton">Guess</button>
    <p id="resultMessage"></p>

    <script>
        let secretNumber = Math.floor(Math.random() * 10) + 1;
        let guess;
        let attempts = 0;

        do {
            guess = parseInt(prompt("Enter your guess (between 1 and 10):"));
            attempts++;

            if (guess === secretNumber) {
                document.getElementById('resultMessage').textContent = `Congratulations! You guessed the number ${secretNumber} in ${attempts} attempts.`;
            } else {
                alert("Incorrect guess. Try again.");
            }
        } while (guess !== secretNumber);
    </script>
</body>
</html>- Math.random() is used to produce a random number between 1 and 10 for the secretNumber.
- The attempts variable tracks the number of attempts the user has made.
- Until the user guesses the right number (guess === secretNumber), the loop will keep going.
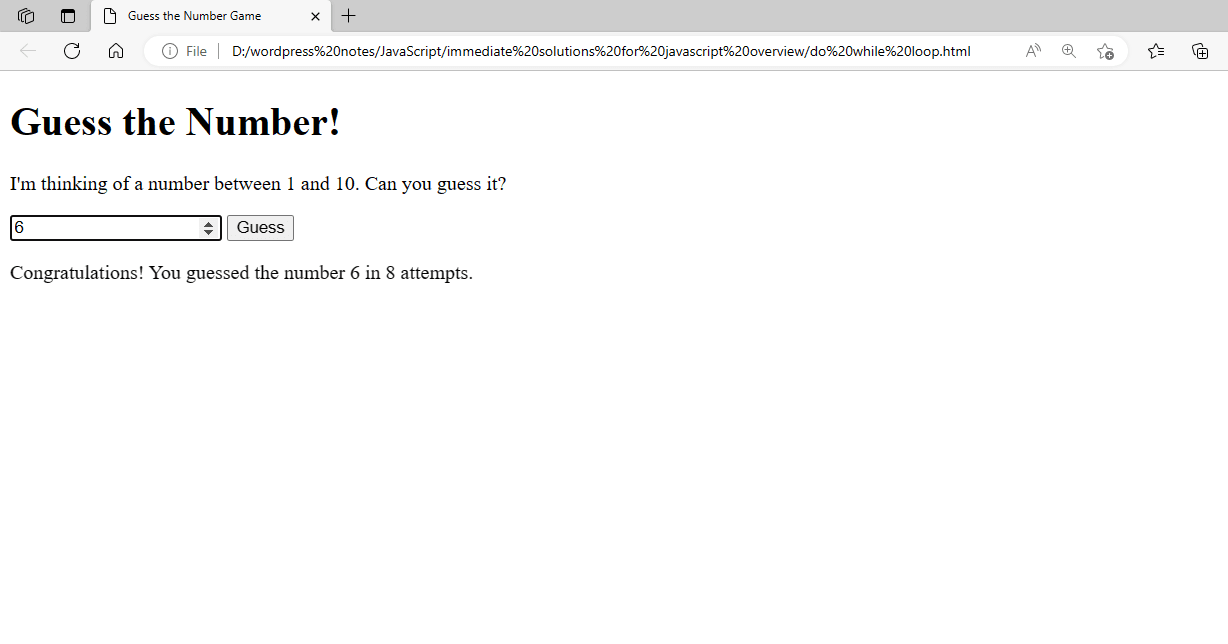
This example shows how to make a straightforward “Guess the Number” game where the player has to predict a randomly generated number using a do…while loop.
Using the For Loop:
In JavaScript, a block of code can be repeated a predetermined number of times using the for loop. It is usually used when you have a predetermined number of executions in mind for a statement or group of statements. Here’s an example of printing the numbers from 1 to 10 using a for loop:
<!DOCTYPE html>
<html lang="en">
<head>
    <meta charset="UTF-8">
    <meta name="viewport" content="width=device-width, initial-scale=1.0">
    <title>Using the for Loop in JavaScript</title>
</head>
<body>
    <h1>Counting with a For Loop</h1>
    <p id="countingResult"></p>

    <script>
        let result = '';

        for (let i = 1; i <= 10; i++) {
            result += `${i} `;
        }

        document.getElementById('countingResult').textContent = `Counting: ${result}`;
    </script>
</body>
</html>- Three steps make up the for loop: increment (i++), condition (i <= 10), and initialization (let i = 1).
- The loop’s initialization is performed once at the start.
- Before every iteration, the condition is verified; if it is true, the loop proceeds; if it is false, the loop ends.
- Following each iteration of the loop body, the increment is executed.
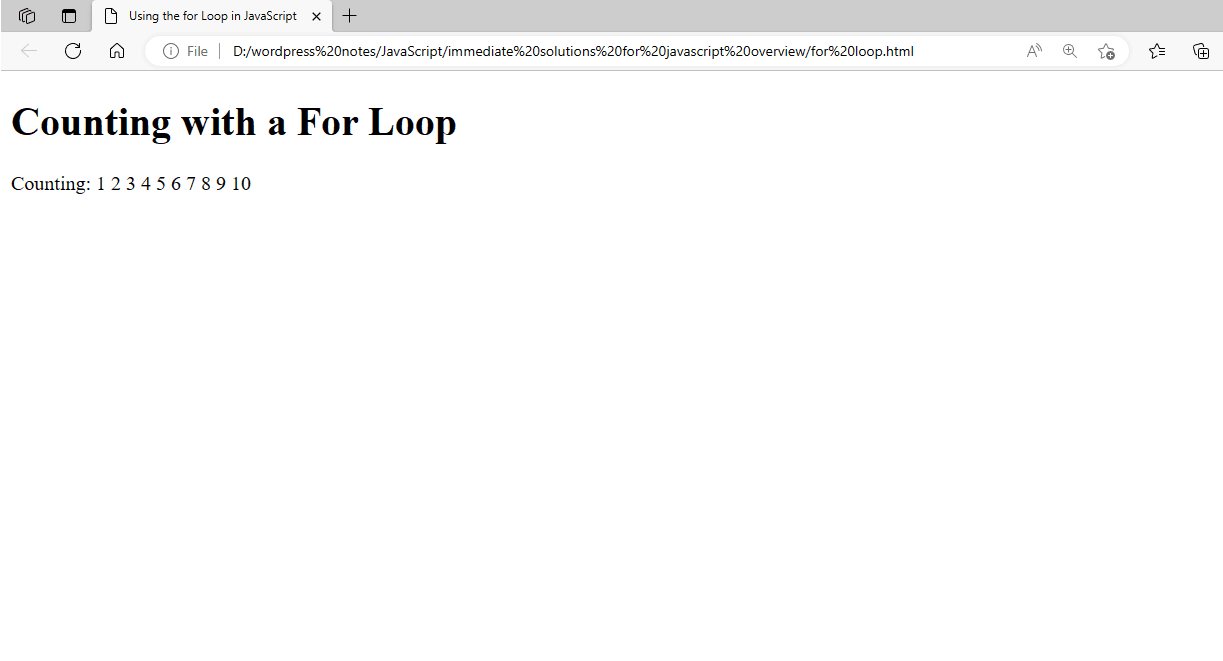
Figure 12 – Displaying the Output of Using the For Loop.
This example shows how to utilize a for loop when the number of iterations is known in advance to carry out a repetitive operation, like counting.
Using the Break Statement:
When a given condition is met, the break statement can be used to end a loop early. We have a basic example in this HTML file that shows how to utilize the break statement in JavaScript to end a loop when a particular condition is satisfied. This is an illustration of how to utilize the break statement inside of a loop:
<!DOCTYPE html>
<html lang="en">
<head>
<meta charset="UTF-8">
<meta name="viewport" content="width=device-width, initial-scale=1.0">
<title>Break Statement Example</title>
</head>
<body>
<h1>Using the Break Statement in JavaScript</h1>
<p>Open the developer tools to see the output.</p>
<p id="output"></p>

<script>
    const numbers = [1, 2, 3, 4, 5, 6, 7, 8, 9, 10];
    let sum = 0;
    let output = document.getElementById('output');

    for (let i = 0; i < numbers.length; i++) {
        sum += numbers[i];
        if (sum > 10) {
            output.innerHTML += `Sum exceeded 10 at index ${i}, breaking out of the loop.<br>`;
            break;
        }
        output.innerHTML += `Current sum at index ${i} is ${sum}.<br>`;
    }

    output.innerHTML += `Final sum: ${sum}`;
</script>
</body>
</html>
First, we define an array called numbers, which has ten numbers in total. To monitor the total of the numbers, we start a variable called sum. To obtain a reference to the <p> element containing the output id, where the output would be displayed, we use document.getElementById(‘output’). Next, we run through the numbers in the numbers array using a for loop. We add each number to the sum variable and then determine whether or not the total exceeds 10. If the sum is greater than 10, the loop is broken by using break after output.innerHTML +=… adds a message to the output element stating that the sum is greater than 10 at the current index. We send a message to the output element stating the current amount at the current index using output.innerHTML +=… if the sum has not surpassed 10. The final step is to add a message to the output element that contains the total of all the numbers.
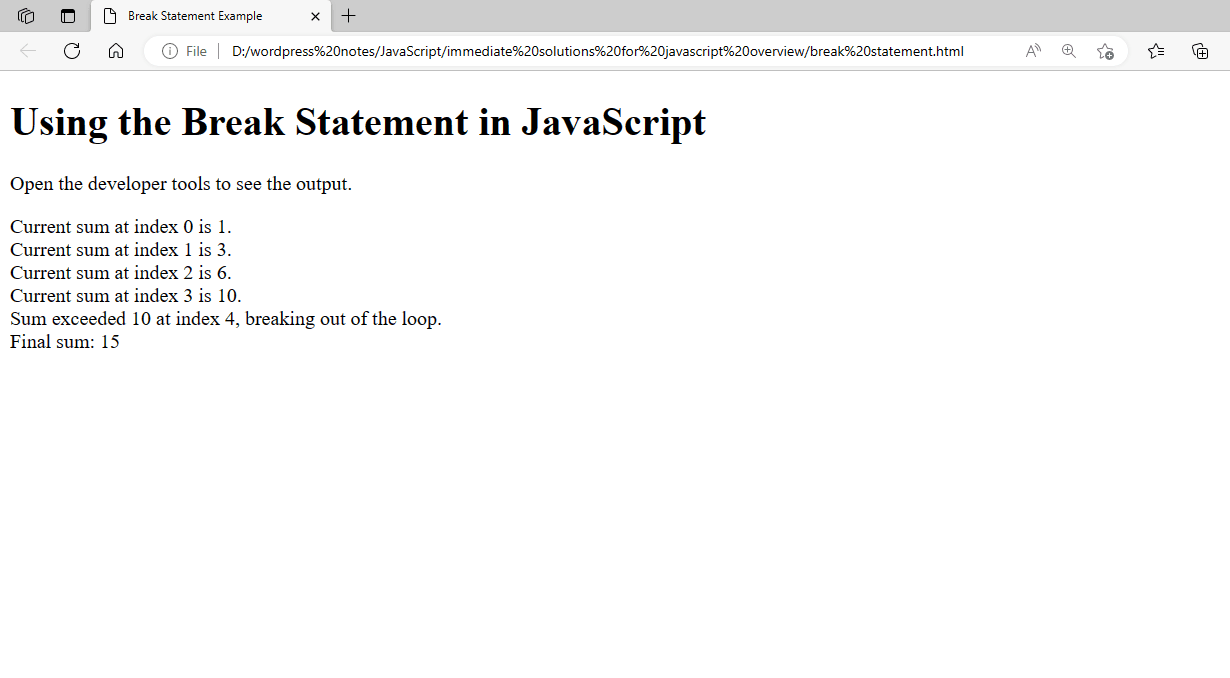
Figure 13 – Displaying the Output of Using the Break Statement
Using the Continue Statement:
This complete example shows how to utilize the continue statement to end a loop iteration when a certain condition is satisfied. Here, we’ll just process odd integers and ignore even ones.
<!DOCTYPE html>
<html lang="en">
<head>
<meta charset="UTF-8">
<meta name="viewport" content="width=device-width, initial-scale=1.0">
<title>Continue Statement Example</title>
</head>
<body>
<h1>Using the Continue Statement in JavaScript</h1>
<p>See the output below:</p>
<p id="output"></p>

<script>
    const numbers = [1, 2, 3, 4, 5, 6, 7, 8, 9, 10];
    let output = document.getElementById('output');

    for (let i = 0; i < numbers.length; i++) {
        if (numbers[i] % 2 === 0) {
            continue; // Skip the rest of the loop iteration for even numbers
        }
        output.innerHTML += `Processing odd number: ${numbers[i]}<br>`;
    }
</script>
</body>
</html>
There is a defined array of integers that contains the digits 1 through 10. To retrieve a reference to the element where the output would be shown, we use document.getElementById(‘output’). The numbers array is iterated over using a for loop. Using the modulus operator (numbers[i] % 2 === 0), the if statement inside the loop determines whether the current number is even. The continue statement is run, which bypasses the remaining code inside the loop and moves on to the following iteration if the number is even. The output.innerHTML +=… function is run if the number is odd to add a message to the output element stating that the odd number is being processed.
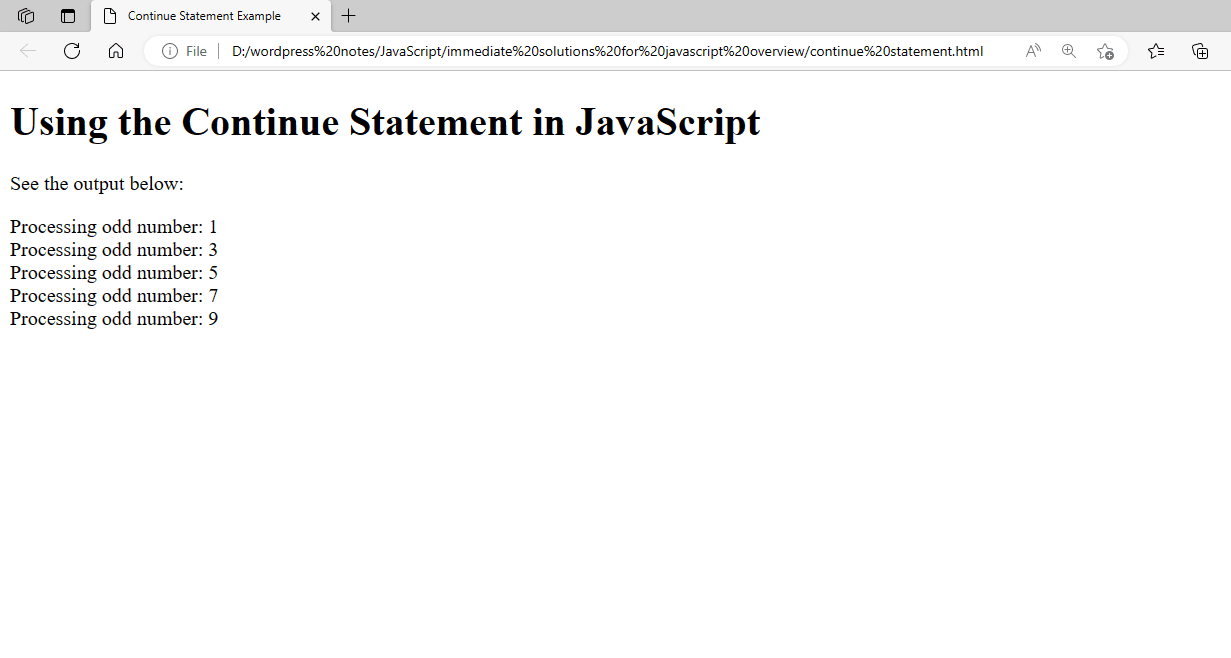
Figure 14- Displaying the Output of Using the Continue Statement
The even numbers are skipped, and only the odd numbers are processed and displayed.
Using the Alert Box:
Here’s a complete example of utilizing JavaScript’s alert method to display a welcoming message. This sample will display a straightforward greeting according to the time of day.
<!DOCTYPE html>
<html lang="en">
<head>
<meta charset="UTF-8">
<meta name="viewport" content="width=device-width, initial-scale=1.0">
<title>Greeting with Alert Box</title>
</head>
<body>
<h1>JavaScript Greeting Example</h1>
<p>Click the button to see a greeting message.</p>
<button onclick="showGreeting()">Show Greeting</button>

<script>
    function showGreeting() {
        const currentHour = new Date().getHours();
        let greeting;

        if (currentHour < 12) {
            greeting = "Good morning!";
        } else if (currentHour < 18) {
            greeting = "Good afternoon!";
        } else {
            greeting = "Good evening!";
        }

        alert(greeting);
    }
</script>
</body>
</html>- Within the <script> tags is the definition of the showGreeting function. To find the current hour of the day, use the new Date().getHours() method (0-23). The function updates the greeting variable to the appropriate message based on the current hour:
- If it’s less than twelve, say, “Good morning!”
- If the hour is between 12 and 18, say, “Good afternoon!”
- “Good evening!” at any time after eighteen.
- The greeting message is then shown using the alert function.
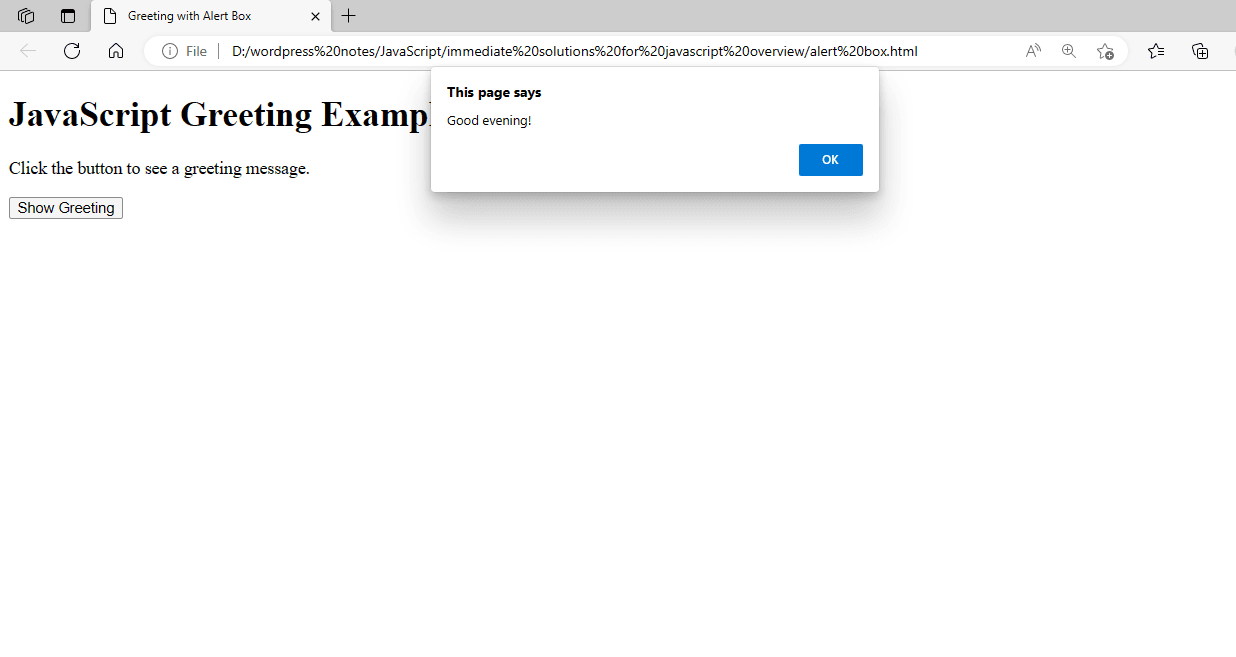
Figure 15 – Displaying the Output of Using the Alert Box
Using the Confirm Box:
JavaScript’s “confirm” function shows an “OK” and a “Cancel” button in a dialog box with a predetermined message. If the user selects “OK,” it returns true; if they select “Cancel,” it returns false. Here is a comprehensive example showing how to utilize the confirm function:
<!DOCTYPE html>
<html lang="en">
<head>
<meta charset="UTF-8">
<meta name="viewport" content="width=device-width, initial-scale=1.0">
<title>Confirm Box Example</title>
</head>
<body>
<h1>JavaScript Confirm Box Example</h1>
<p>Click the button to see a confirmation dialog.</p>
<button onclick="showConfirm()">Show Confirm</button>
<p id="result"></p>

<script>
    function showConfirm() {
        // Display a confirm box with a message
        const userConfirmed = confirm("Do you want to proceed?");

        // Get the result element to display the message
        const resultElement = document.getElementById('result');

        // Check the user's response and display the appropriate message
        if (userConfirmed) {
            resultElement.textContent = "User clicked OK.";
        } else {
            resultElement.textContent = "User clicked Cancel.";
        }
    }
</script>
</body>
</html>
Within the <script> tags is the definition of the showConfirm function. A confirmation dialog box with the question “Do you want to proceed?” is displayed by the confirm (Do you want to proceed?”) function. The userConfirmed variable holds the boolean value that is obtained from the confirm function. The <p> element, which contains the result that will be displayed, can be referenced using the document.getElementById(‘result’) function. The result element displays the text “User clicked OK.” if the if statement verifying the value of userConfirmed is true. If false, the result element displays the text “User clicked Cancel.”
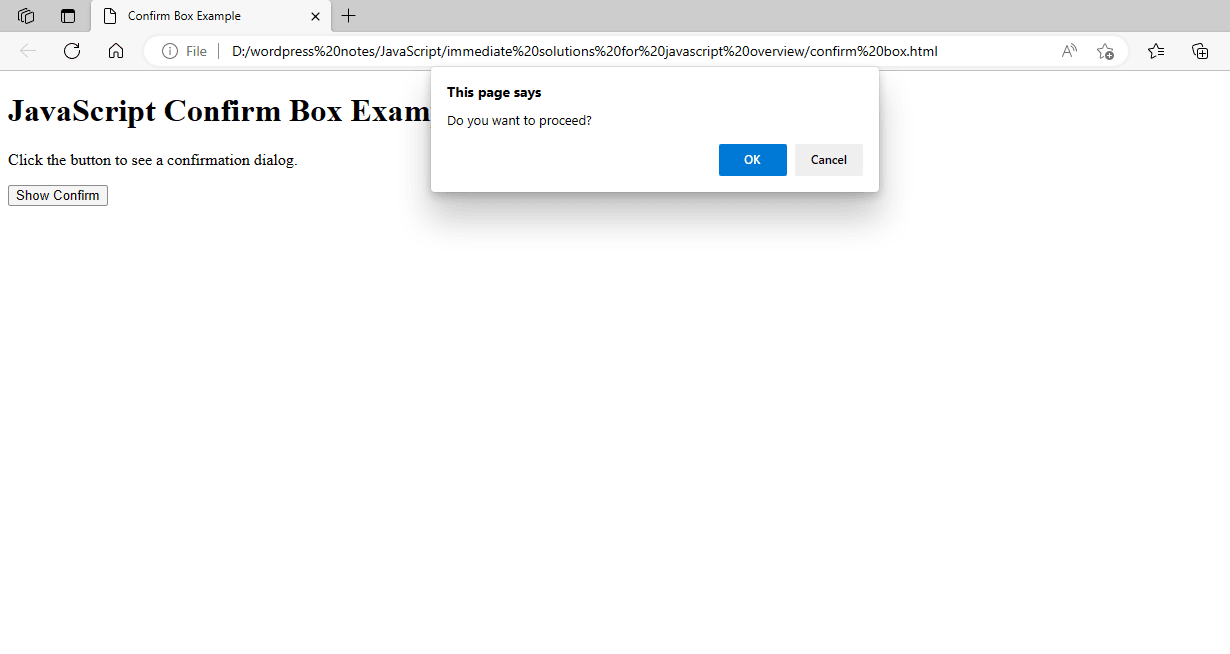
Figure 16 – Displaying the Output of Using the Confirm Box
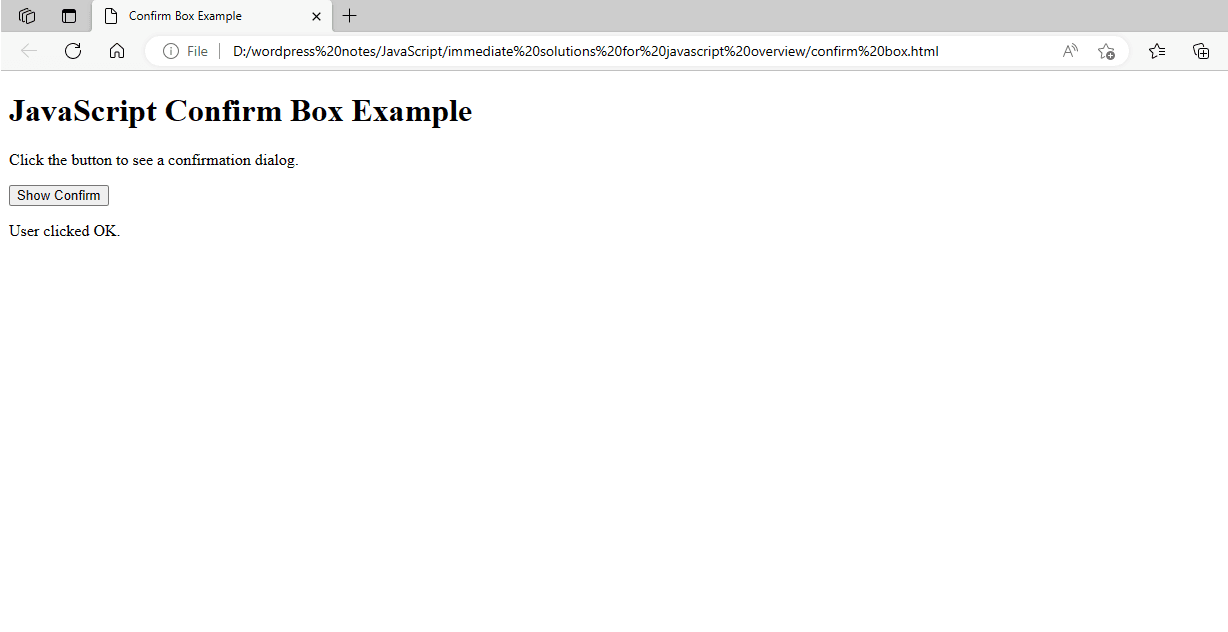
Figure 17 – Displaying the Output of Using the Confirm Box after clicking OK
This example shows how to manage the user’s response in JavaScript and how to present a confirmation dialog using the confirm function.
Using the Prompt Box:
JavaScript’s prompt function asks the user for input by displaying a dialog window. The “OK” and “Cancel” buttons are located alongside a text field in the dialog box. Clicking “OK” or “Cancel” will cause the prompt function to return the text the user typed; clicking “OK” will cause it to return null.
Here’s a full example demonstrating the use of the prompt function:
<!DOCTYPE html>
<html lang="en">
<head>
<meta charset="UTF-8">
<meta name="viewport" content="width=device-width, initial-scale=1.0">
<title>Prompt Box Example</title>
</head>
<body>
<h1>JavaScript Prompt Box Example</h1>
<p>Click the button to enter your name.</p>
<button onclick="showPrompt()">Enter Name</button>
<p id="result"></p>

<script>
    function showPrompt() {
        // Display a prompt box with a message
        const userName = prompt("Please enter your name:", "Your name here");

        // Get the result element to display the message
        const resultElement = document.getElementById('result');

        // Check the user's response and display the appropriate message
        if (userName !== null) {
            resultElement.textContent = `Hello, ${userName}!`;
        } else {
            resultElement.textContent = "User cancelled the prompt.";
        }
    }
</script>
</body>
</html>
Within the <script> tags is the definition of the showPrompt function. The prompt dialog with the message “Please enter your name:” and the default text “Your name here” is displayed by the prompt(“Please enter your name:”, “Your name here”) function. The userName variable holds the prompt function’s output, which can either be a string or null. The <p> element, which contains the result that will be displayed, can be referenced using the document.getElementById(‘result’) function. The value of userName is verified by the if statement:
The line Hello, [userName]! appears in the result element if the user submitted a name (and it wasn’t null).
The text “User canceled the prompt.” appears in the result element if the user clicked “Cancel,” which returns null.
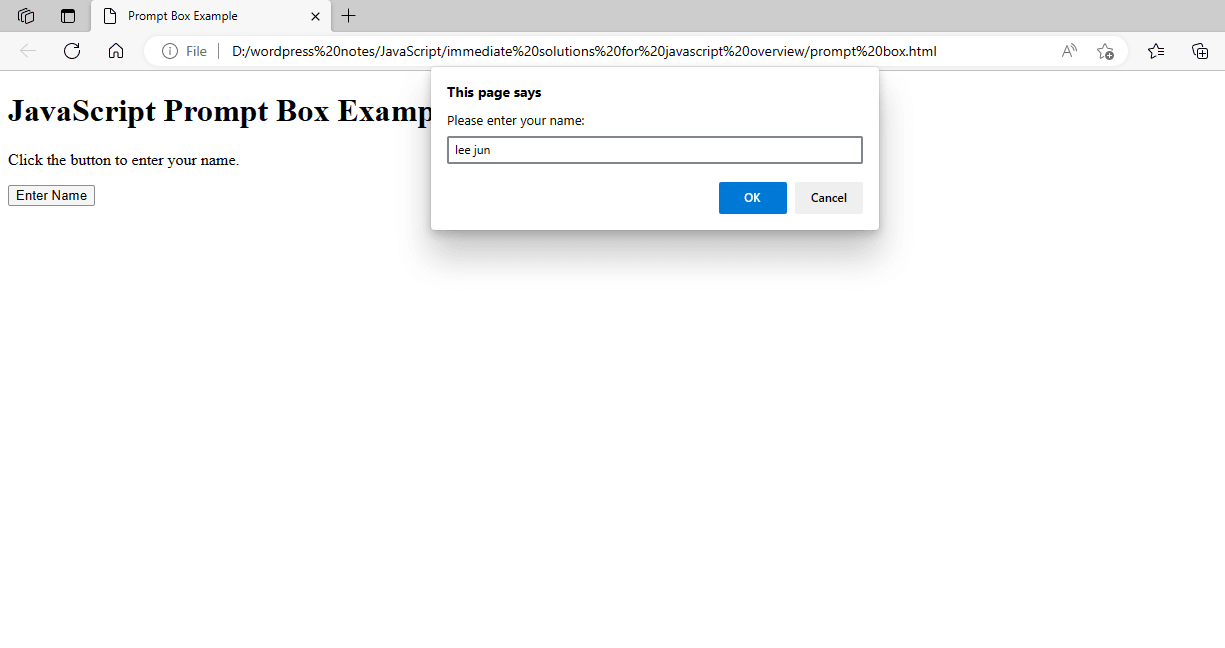
Figure 18 – Displaying the Output of Using the Prompt Box
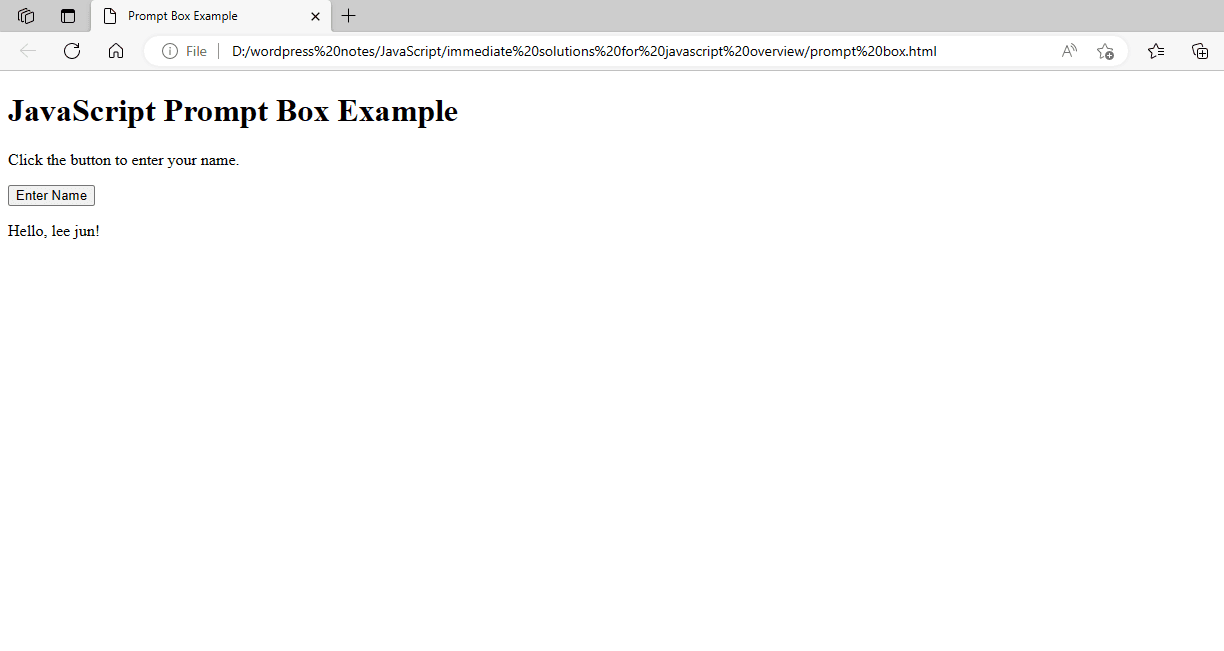
Figure 19 – Displaying the Output of Using the Prompt Box after clicking OK
This example shows you how to utilize JavaScript’s prompt function to get user input and handle the user’s response.